 Go to Kayako
Overview
Service level agreements (SLAs) and escalations both play a significant role in the support industry. It is one of the ways to ensure you are providing excellent customer service in a timely manner. Using Kayako Classic's reporting query language (KQL), you can build reports that will give you insight into your SLA and escalations metrics.
In this article, we will show you how to build a few commonly requested reports. The reports we will outline below cover the following:
- Overdue tickets
- Escalated tickets, by department
- Average first response time for tickets, overall
- Average response time for tickets created today
- Breakdown of tickets that have been waiting on a reply for 24 hours, 24-48 hours, and more than 72 hours
- Average response time for ticket posts created during working hours
Process
To create the report, follow the steps mentioned below:
- Log into the staff control panel.
- Click Reports in the top navigation bar.
- Click the New Report link that appears below it.
- In the New Report pop-up that appears, enter a descriptive title for your report in the Title field.
- From the Primary Source pulldown select Tickets.
- Click Next to create your blank report.
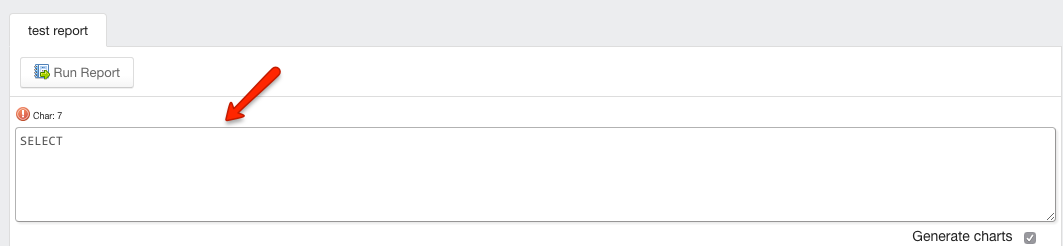
- On the next page, you will see a text area with the word SELECT in it. This is where you will enter the KQL query that will pull your report.
- Based on the report you want to create, copy the query code, and paste it into the text area on your report page.
-
Overdue tickets
SELECT 'Tickets.Ticket Mask ID', 'Tickets.Status', IF(('Tickets.Reply Due Date' <= DateNow()) AND ('Tickets.Reply Due Date' != ''), 'Overdue', 'Not Overdue') as 'OVERDUE Status' FROM 'Tickets' WHERE 'Tickets.Creation Date' = ThisMonth() AND 'Tickets.Is Resolved' = '0' -
Escalated tickets, by department
SELECT SUM(IF(('Tickets.Is Escalated' = '1') ,1,0)) AS Escalated , SUM(IF(('Tickets.Is Escalated' = '0') ,1,0)) AS 'Non-Escalated' FROM 'Tickets' WHERE 'Tickets.Creation Date' = ThisMonth() GROUP BY 'Tickets.Department'Note: You can also set up an SLA based on Ticket Priority or Ticket Status by specifying it in the criteria. This helps in automatically changing the SLA plan when a ticket is moved from one priority to another or from one status to another.
-
Average first response time for tickets, overall
SELECT AVG('Tickets.First Response Time') FROM 'Tickets' WHERE 'Tickets.Creation Date' = ThisMonth() AND 'Tickets.First Response Time' > '0'Note: We do have default reports available for an average of first response time that you can find by navigating to Staff Control Panel > Reports > Manage Reports > search with First Response. It will list all related reports.
-
Average response time for tickets created today
SELECT AVG('Ticket Posts.Response Time') FROM 'Ticket Posts' WHERE 'Ticket Posts.Creation Date' = today() AND 'Ticket Posts.Creator' = 'Staff' AND 'Ticket Posts.Response Time' > '0' Group by 'Ticket Posts.Full Name' -
Breakdown of tickets that have been waiting on a reply for 24 hours, 24-48 hours, and more than 72 hours
SELECT Sum(IF('Tickets.Last User Reply' <= '86400', 1,0)) AS 'Within 24 hours', Sum(IF('Tickets.Last User Reply' > '86400' AND 'Tickets.Last User Reply' <= '172800', 1,0)) AS ' 24-48 hours', Sum(IF('Tickets.Last User Reply' > '259200', 1,0)) As 'More than 72 hours' FROM 'Tickets' WHERE 'Tickets.Status' = 'Open' AND 'Tickets.Creation Date'>= Date_Sub(NOW(), INTERVAL 5 Day) -
Average response time for ticket posts created during working hours
SELECT AVG('Ticket Posts.SLA Response Time') FROM 'Ticket Posts' WHERE 'Ticket Posts.Creation Date' = ThisMonth() AND 'Ticket Posts.Creator' = 'Staff' AND 'Ticket Posts.Response Time' != '0' GROUP BY Y('Ticket Posts.Full Name')
-
- Click Run Report to see your results.
Priyanka Bhotika
Comments