 Go to Kayako
Overview
You may receive multiple email notifications sent on a certain interval (i.e., every 10 minutes) stating that the email was rejected due to its size limit. If the email queue is configured as IMAP or POP3, the system works by connecting to your mail server through a cron, which schedules the tasks according to the time provided, to fetch all emails from the server, and deliver it to your email queue (inbox) in Kayako. If a certain email was not picked up during the scheduled interval, the system will attempt to fetch it again on the next scheduled run. Hence, causing multiple notifications sent to the sender.
There's a setting in the helpdesk that defines the ‘Email Size Limit’ (header + attachment) of the incoming emails. Emails greater than the size defined will not be fetched by the helpdesk.
This article provides steps on how to resolve issues with multiple notifications due to the email size limit.
Prerequisite
- Access to your email server
- Access to the Kayako Classic Admin panel
Solution
First, find the offending email so you can deal with it accordingly.
- Find the email from your server that contains an attachment larger than the email size defined in your settings.
- To check the email size defined in your instance, go to Admin CP > Settings >Email Parser > Email size limit.
- Then decide to whether delete or move it to a different folder.
- You may also notify the sender to upload the attachment to cloud storage such as Google Drive and share the link instead of sending the file.
Then, create a parser rule using the steps below to prevent multiple notifications due to the email size limit.
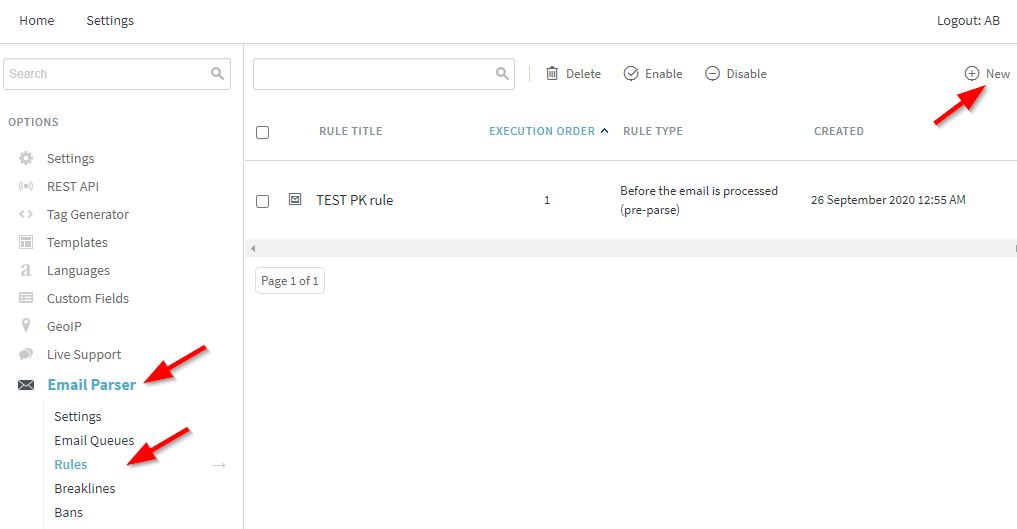
- Go to Admin CP > Email Parser > Rules.
- Click the +New button.
- In the criteria section under General, use the Total attachment size > Equal to > 'Size you want to define'. (see sample below)
- NOTE: The email size should be less than the ‘Email Size Limit’ you've set.
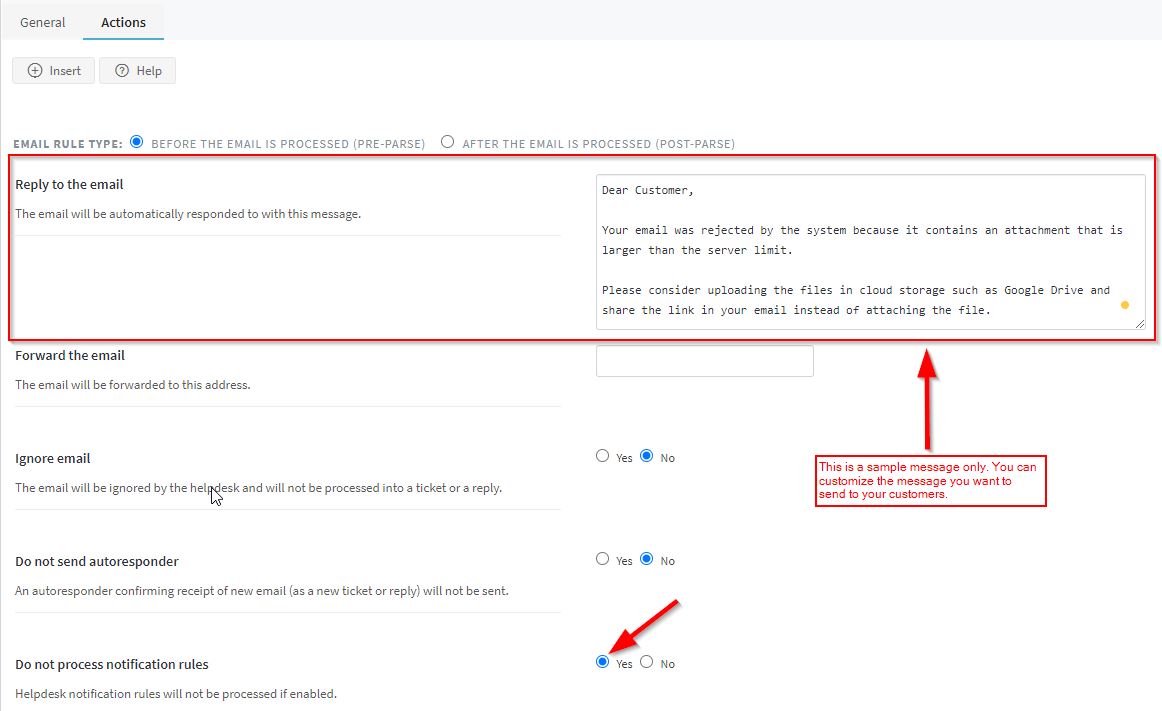
- In the Actions tab, select Yes on the 'Do not process notification rules' option. (see screenshot below)
- Additionally, you can enter a customized reply in the 'Reply to the email' section such as the one in the screenshot below.
- Click the +Insert button in the upper left to create the parser rule.

Priyanka Bhotika
Comments