 Go to Kayako
This document provides steps in setting up OAuth 2.0 in Kayako Classic using Google.
⚠️ This is only available from version 4.94.7 onwards.
You can refer to the following article for guidance Upgrading or Downgrading Your Kayako Classic Download Helpdesk
Step 1: Create an Organization
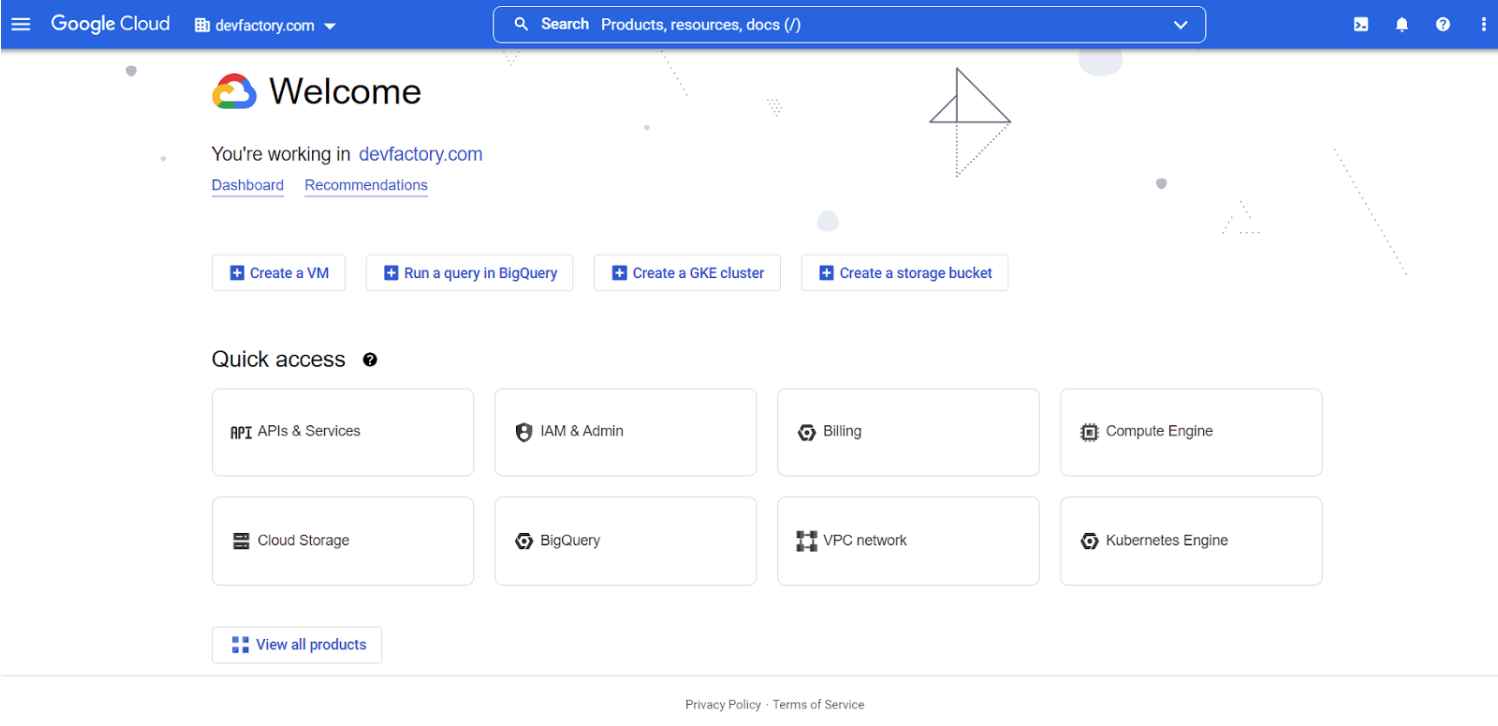
After you login to Google Console, you would be landing at the organization page as seen in the screenshot below. The dropdown option on the top blue bar shows the organization.
Step 2: Create new Project
Click on the organization dropdown and you would be presented with an option to create a new Project, as shown below.
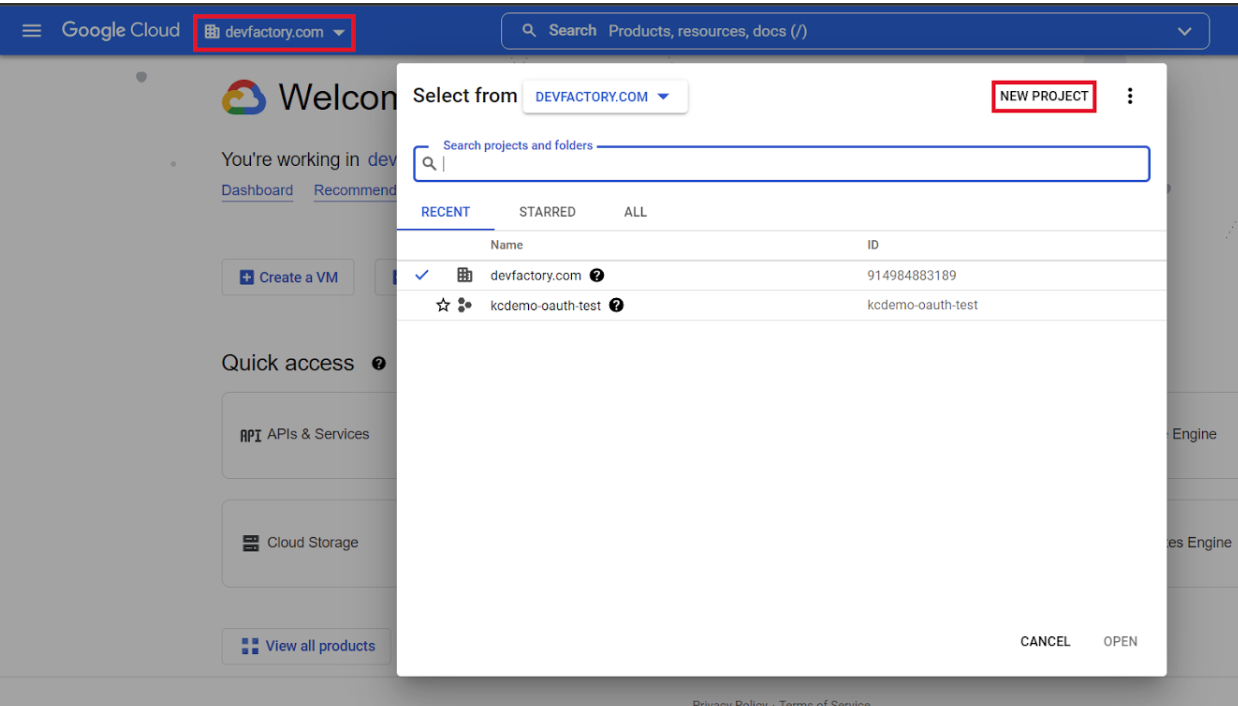
Click on the New Project to create a new project and provide the project name

Step 3: OAuth Consent Screen
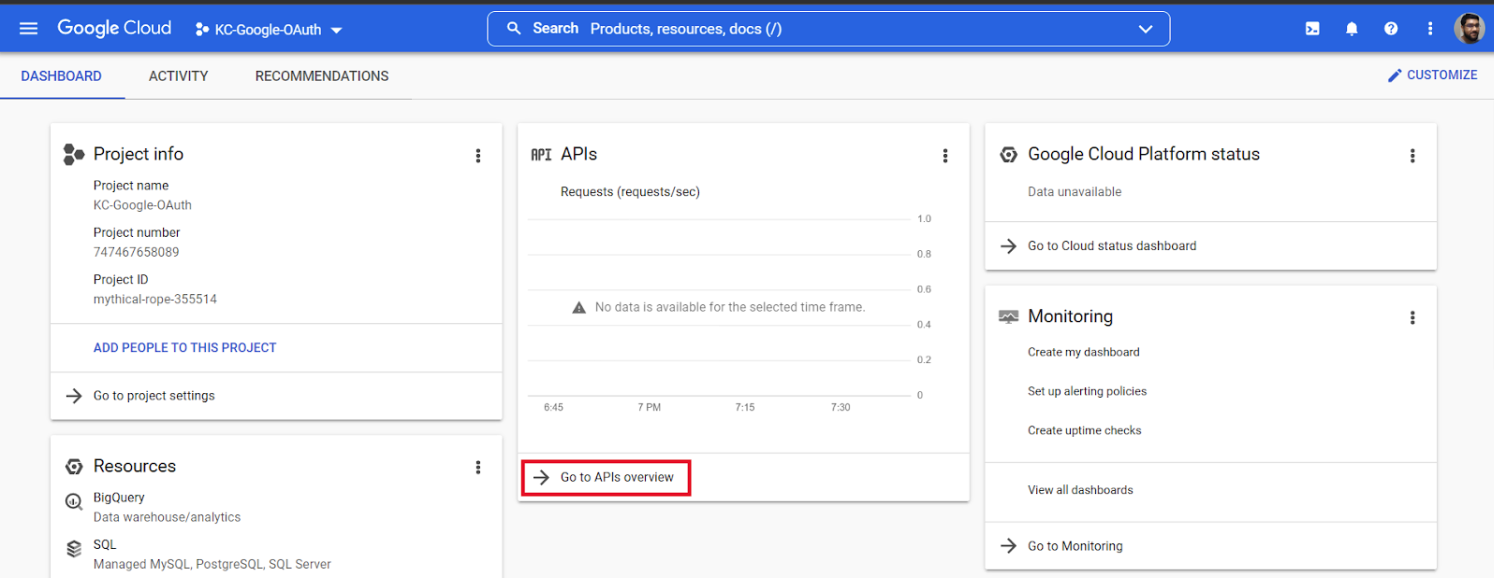
On creating a new project, navigate to the project page and click on Go to APIs overview section as shown below.
Once we create a project, we need to configure the project to enable OAuth. Following are the steps to enable the project for OAuth.
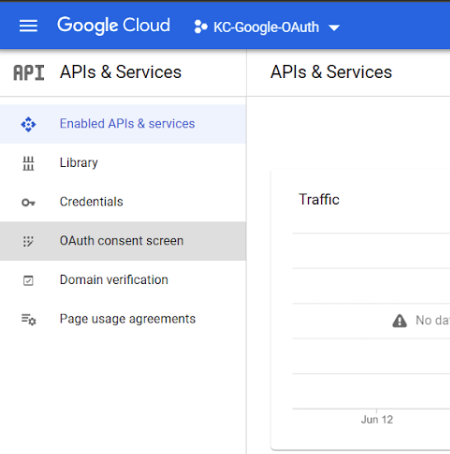
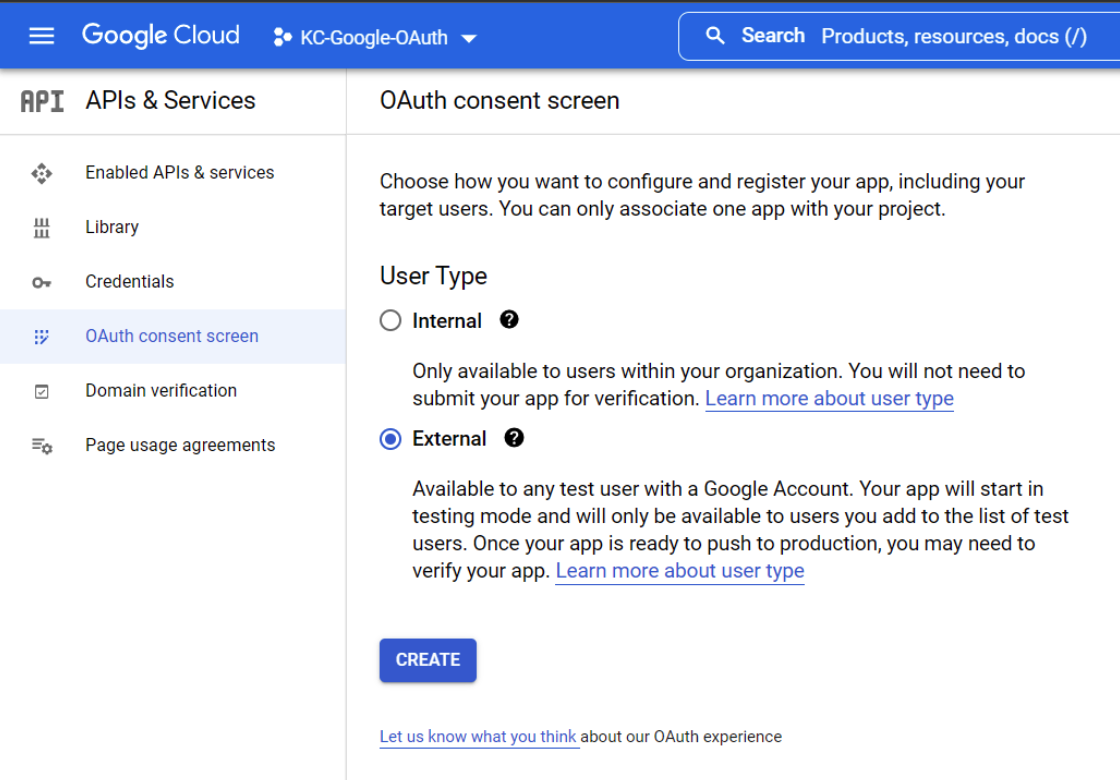
The first thing to do is set up the OAuth Consent screen. Click on the OAuth Consent screen menu in the left panel.
You would be presented with a screen as shown below. Based on whether you want external users or not select the option Internal or External and click on CREATE button.
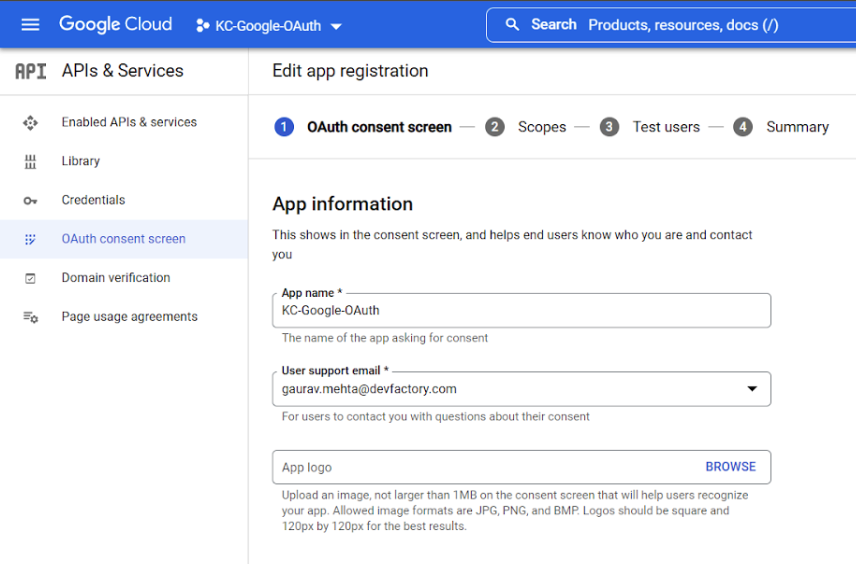
The next step would be to enter some basic information about the app that we created.
App Information
Only mandatory fields are App name, User support email (a dropdown to select from), Developer Contact information (the email address can be the same you selected from the dropdown for support email). You can provide other details as well, like App logo, Application home page url, Application privacy policy url, Application terms of service url but they are all optional.
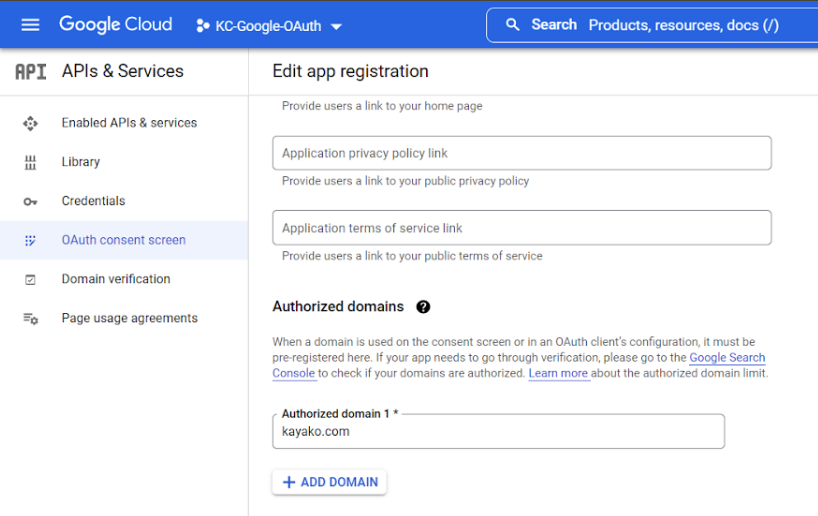
Also add your Kayako Classic domain (Kayako.com or Helpserve.com) to the Authorized domains before clicking on Save and Continue button.
Scopes
To authorize Kayako Classic to read emails using OAuth, we would need to add scopes to the application. In this step, add/select the following scopes by clicking on ADD OR REMOVE SCOPES button as shown in the screenshot below.
Check the highlighted boxes in the right panel that comes up after clicking the Add or Remove Scopes button.
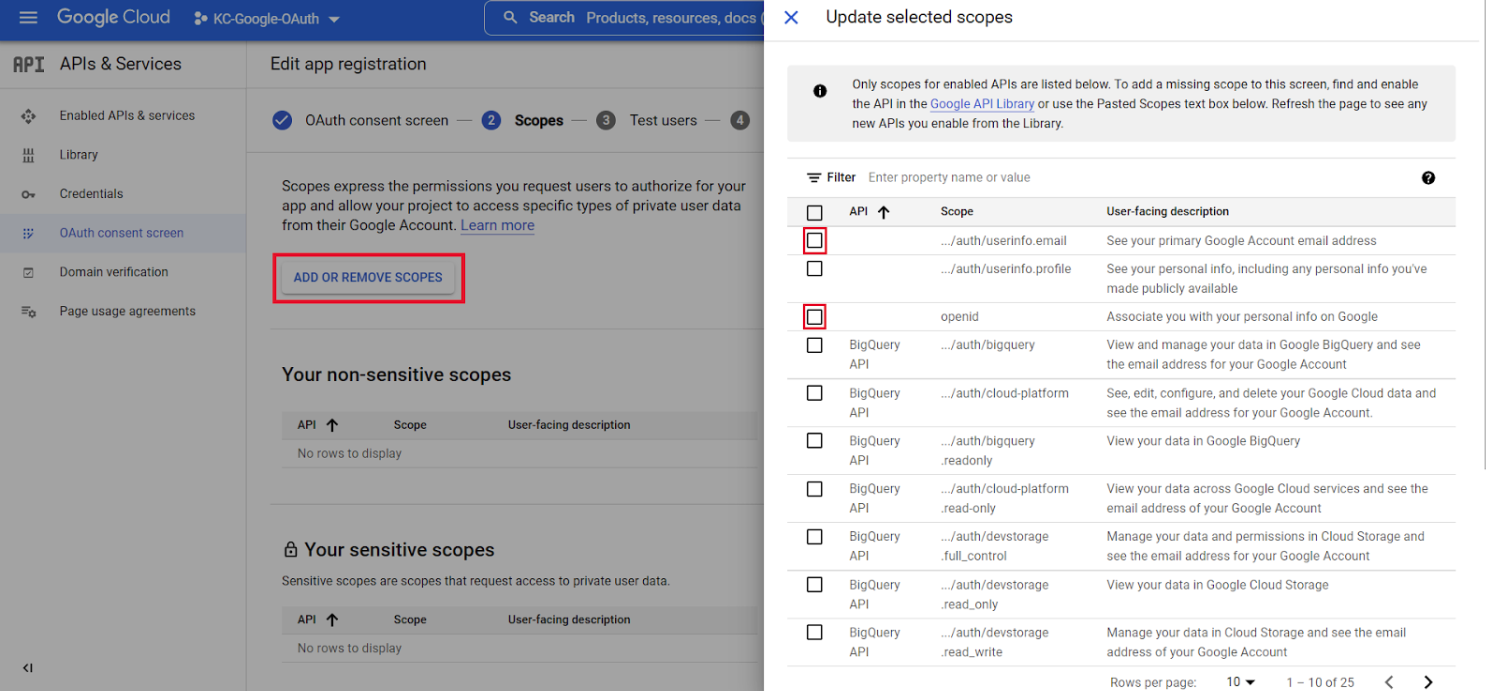
Scroll down in the right panel and you would see a section for Manually add scopes, add the following URL “https://mail.google.com/” and click on ADD TO TABLE before clicking UPDATE button.
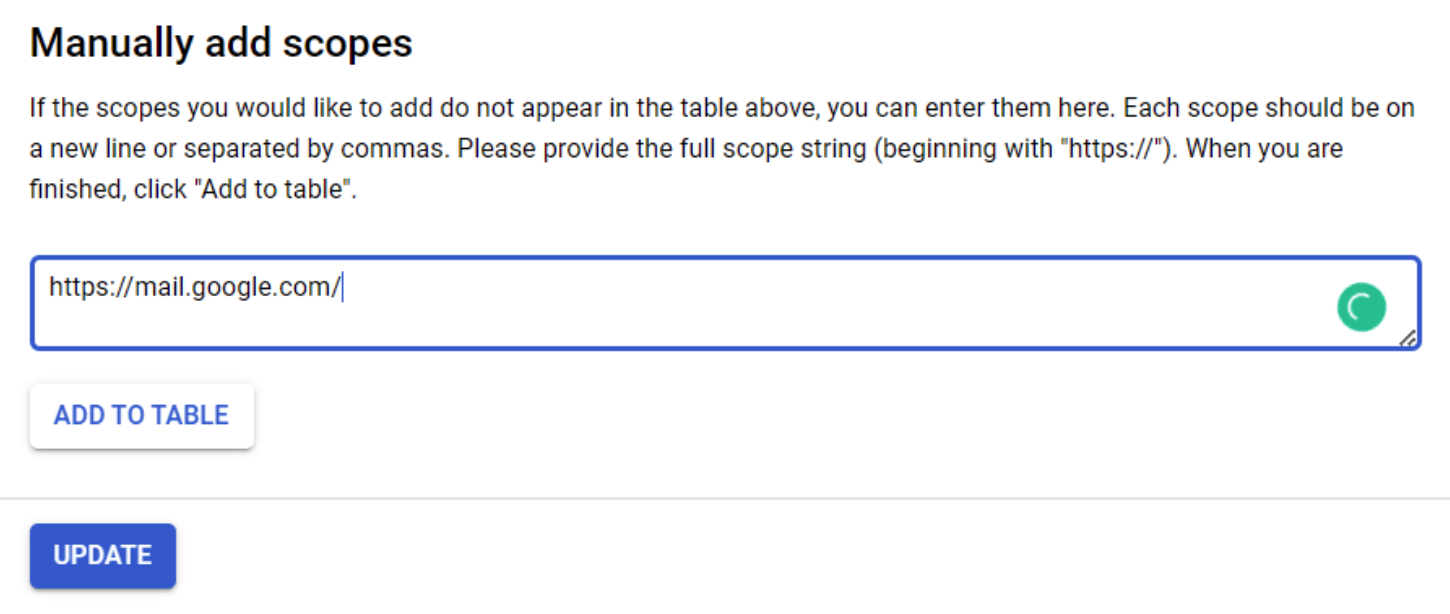
This will ensure you have added all the scopes and the permissions required for the application. Click on SAVE AND CONTINUE button at the bottom.
Test users
Before finishing the app permissions, the last step is to add a Test user. Click on the ADD USERS button to render the right panel. Add the test user that whose email address would be used while configuring the Kayako Classic Email Queue. Finish adding the user and click on ADD button

Summary
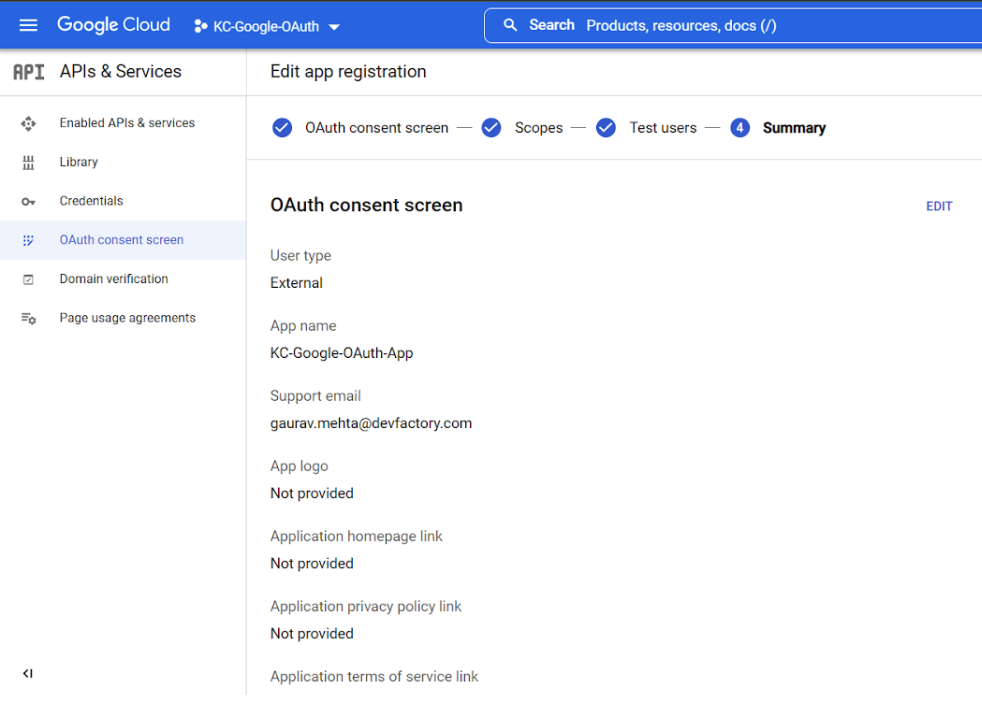
You would land on the App registration summary page. Check the details and scroll down to the bottom and click on BACK TO DASHBOARD button.
Step 4: Create Credentials
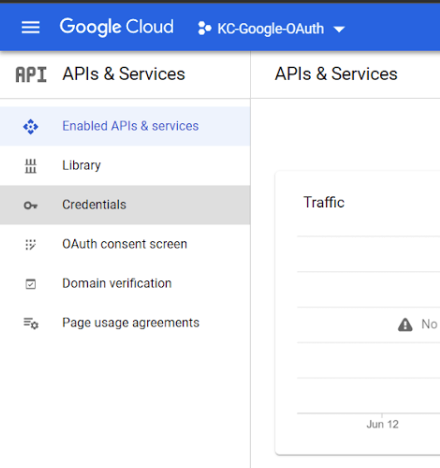
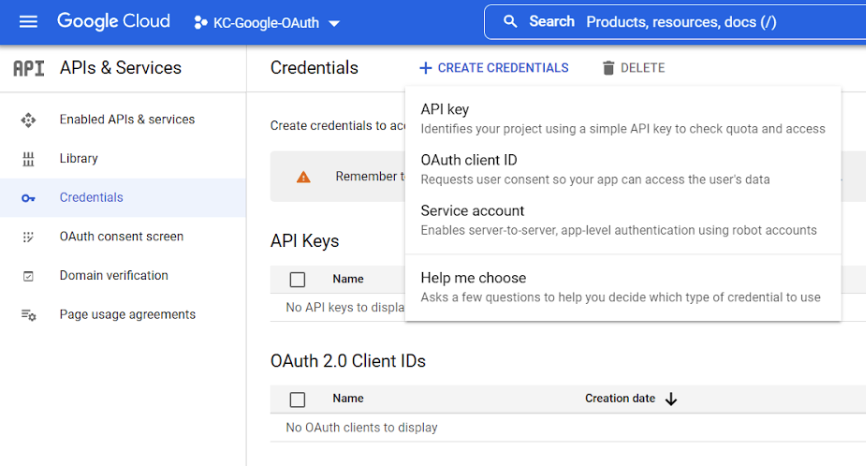
Click on the Credentials section in the left panel (as seen in the screenshot below) and you would be presented with a screen containing API Keys, OAuth 2.0 Client IDs & Service Account.
Click on the Create Credentials option at the top to create credentials for OAuth Client ID
Select Web application in the Application type dropdown, provide a name to the OAuth client credentials
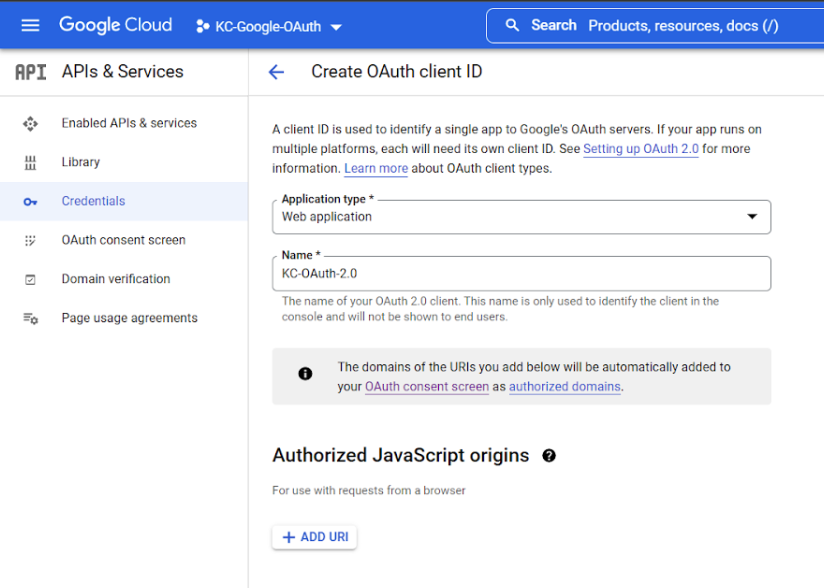
Also, add the Authorized redirect URIs. Replace your Kayako Classic instance domain in the below URL and copy it in the URIs box and click CREATE
https://<KAYAKO_CLASSIC_DOMAIN>/admin/verifyoauth

Upon creating the Client Credentials, you would see a pop-up showing the Client ID & Client Secret. Copy the values of these parameters as we would need these credentials later while configuring the email queue in Kayako Classic.
Step 5: Setup Support email in Kayako Admin Panel
After completing the Google OAuth setup, you need to configure the settings in your Kayako Classic instance to enable Kayako to read and parse email from your Google email. Follow these steps to configure OAuth in Kayako Classic version 4.94.7 and above.
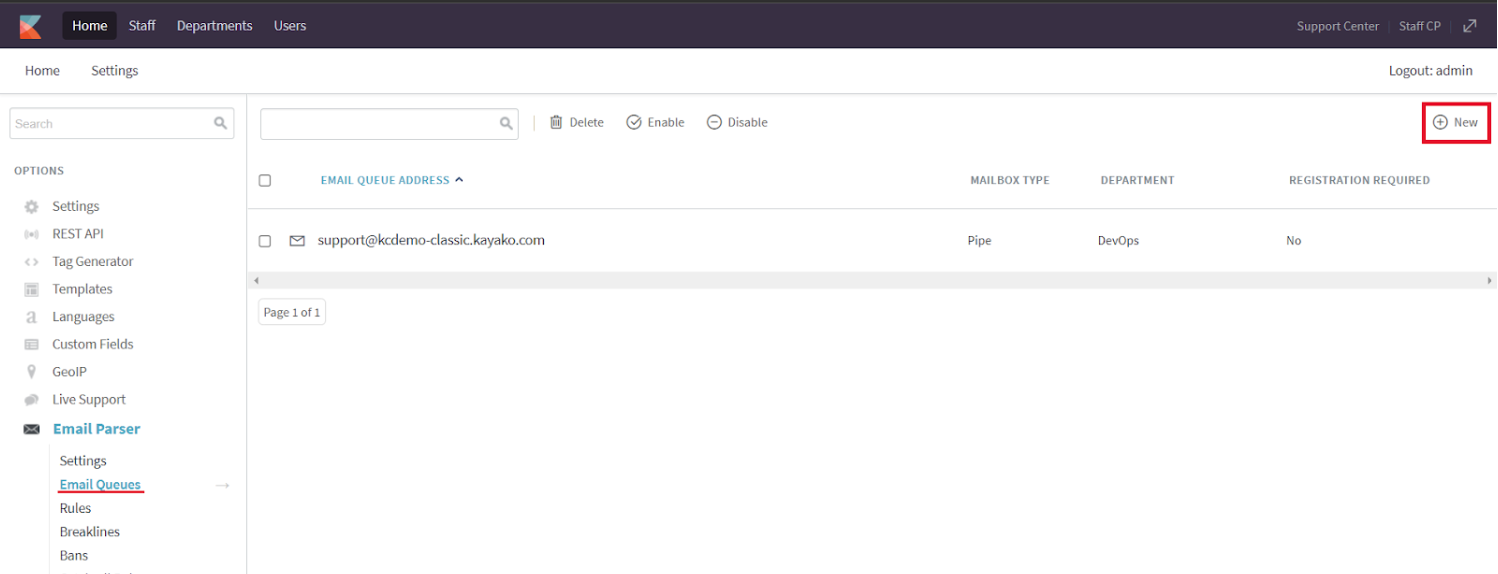
- Login to your Classic instance as an Admin user and navigate to Admin Panel > Email Parser > Email Queues and click on New as shown in the screenshot below
- You would be presented with a screen as shown below
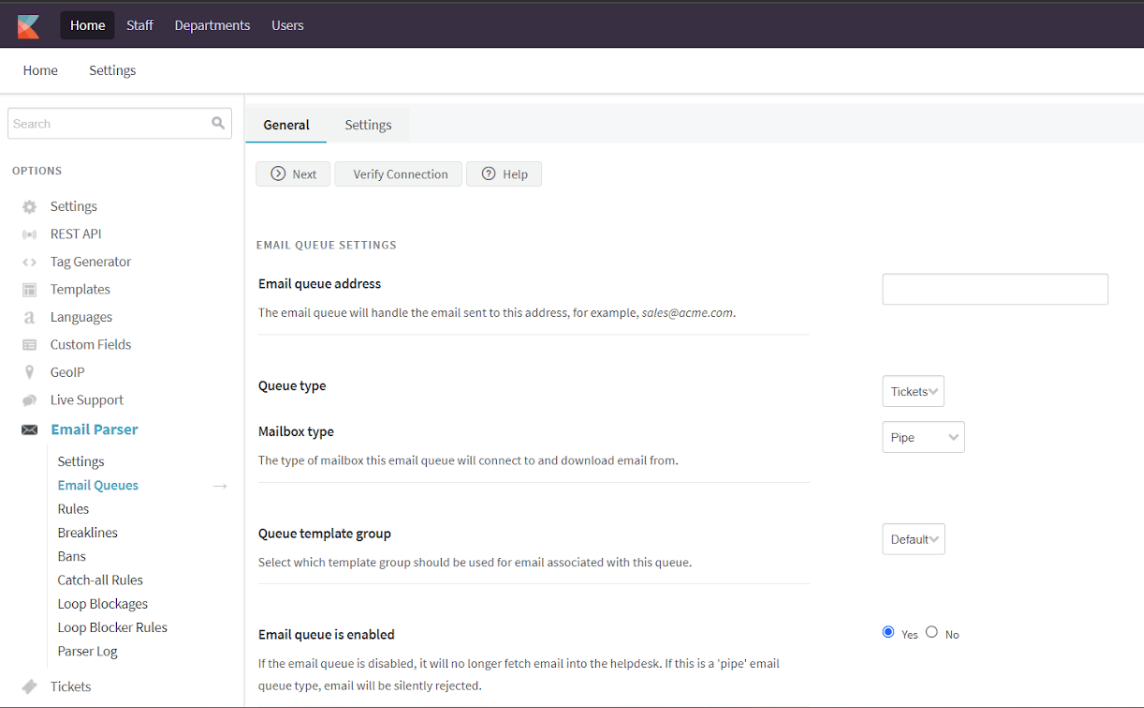
Enter the values for the properties based on the information provided below
Enter queue address: Your support email
Mailbox type: Select POP3 SSL or IMAP SSL
Mailserver hostname: imap.gmail.com
Port Number: 993
Authentication Type: OAuth
Client Id: Provide the value obtained in Step 4
Client Secret: Provide the value obtained in Step 4
Authorization Endpoint: The value for this parameter is a URL as mentioned below.
https://accounts.google.com/o/oauth2/v2/auth
Token Endpoint: The value for this parameter is a URL as mentioned below.
https://oauth2.googleapis.com/token
Authentication Type: openid email https://mail.google.com/
Ignore recipient addresses and force into queue: Yes
Use the same mailserver to send email: Yes
SMTP connection type: SSL (Depends on the email setup on clients end)
- After entering the values, click on the NEXT button at the top of the page and you should see the following page
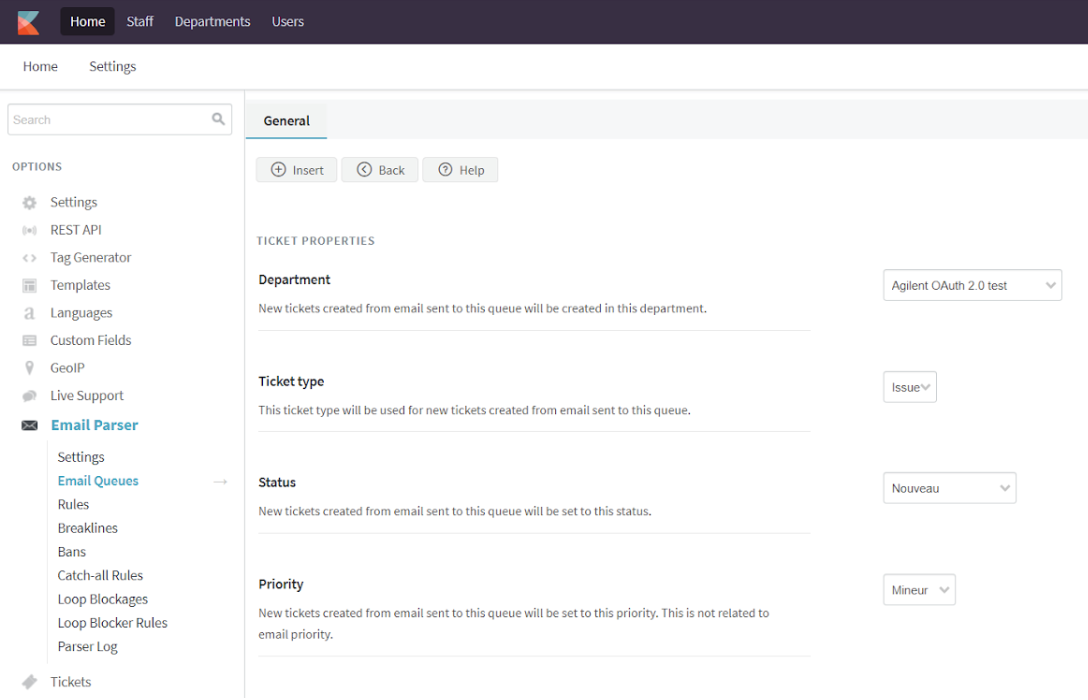
Enter the values for the properties based on the information provided below and click INSERT to finish the setup
Department: Select the department in which tickets should be created
Ticket type: Select the Ticket Type for new tickets
Status: Select the default status of a new ticket
Priority: Select the default priority for new tickets
Priyanka Bhotika
Comments
Amjad Sar
After a certain amount of time, it stops working and displays the problem notice below. Clicking "verify connection" and adjusting the mail queue will restore functionality. any idea how to fix this issue?
One or more errors occurred when reading Queue #3---------------------------------------------------Error connecting to IMAP using access token: No access token received upon refresh---------------------------------------------------Queue Total: , Accepted: , Rejected: Final Total: 0, Accepted: 0, Rejected: 0