 Go to Kayako
This document provides steps in setting up OAuth 2.0 in Kayako Classic using O365.
⚠️ This is only available from version 4.94.7 onwards.
You can refer to the following article for guidance Upgrading or Downgrading Your Kayako Classic Download Helpdesk
⚠️HTTPS is required in Kayako for completing the configuration.
Please follow the steps for Adding or Updating SSL Certificates For Your Kayako Classic Custom Domain before starting with the below procedure.
⚠️Each Email Queue connects only the mailbox of the verifying user.
When using OAuth, Kayako Classic binds each Email Queue to the specific user account that completes the "Verify Connection" step. If a global admin authenticates, the queue will pull emails from the admin's mailbox—not the intended support address. Always use the correct mailbox credentials during verification. This behavior is by design and ensures token-based access isolation.
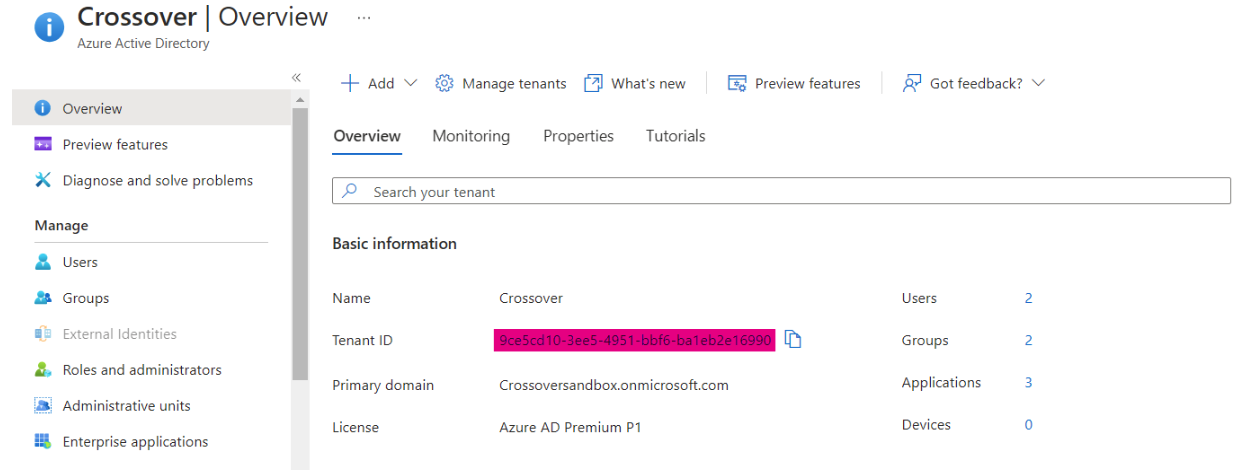
Step 1: Create an Organization and get the Tenant ID
Go to Azure https://portal.azure.com/ and create an Organization. Once you create the organization, you should see something like the following screenshot. We would need the Tenant ID (as highlighted below) while configuring the OAuth in Kayako Classic settings.
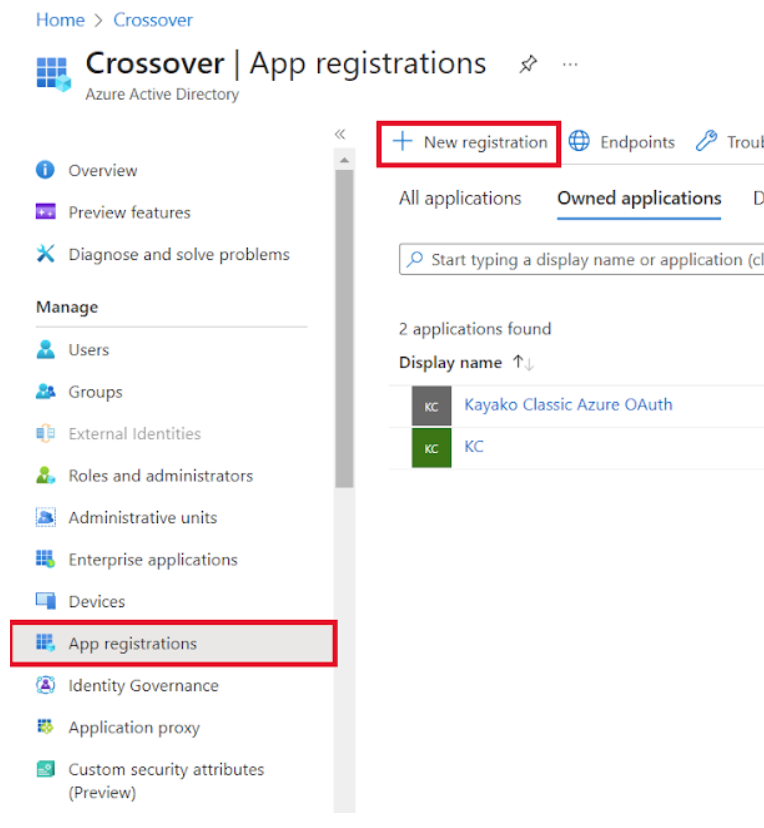
Step 2: Register the Kayako App
After creating an Organization, Click on App Registration > New Registration to create a new App within the organization
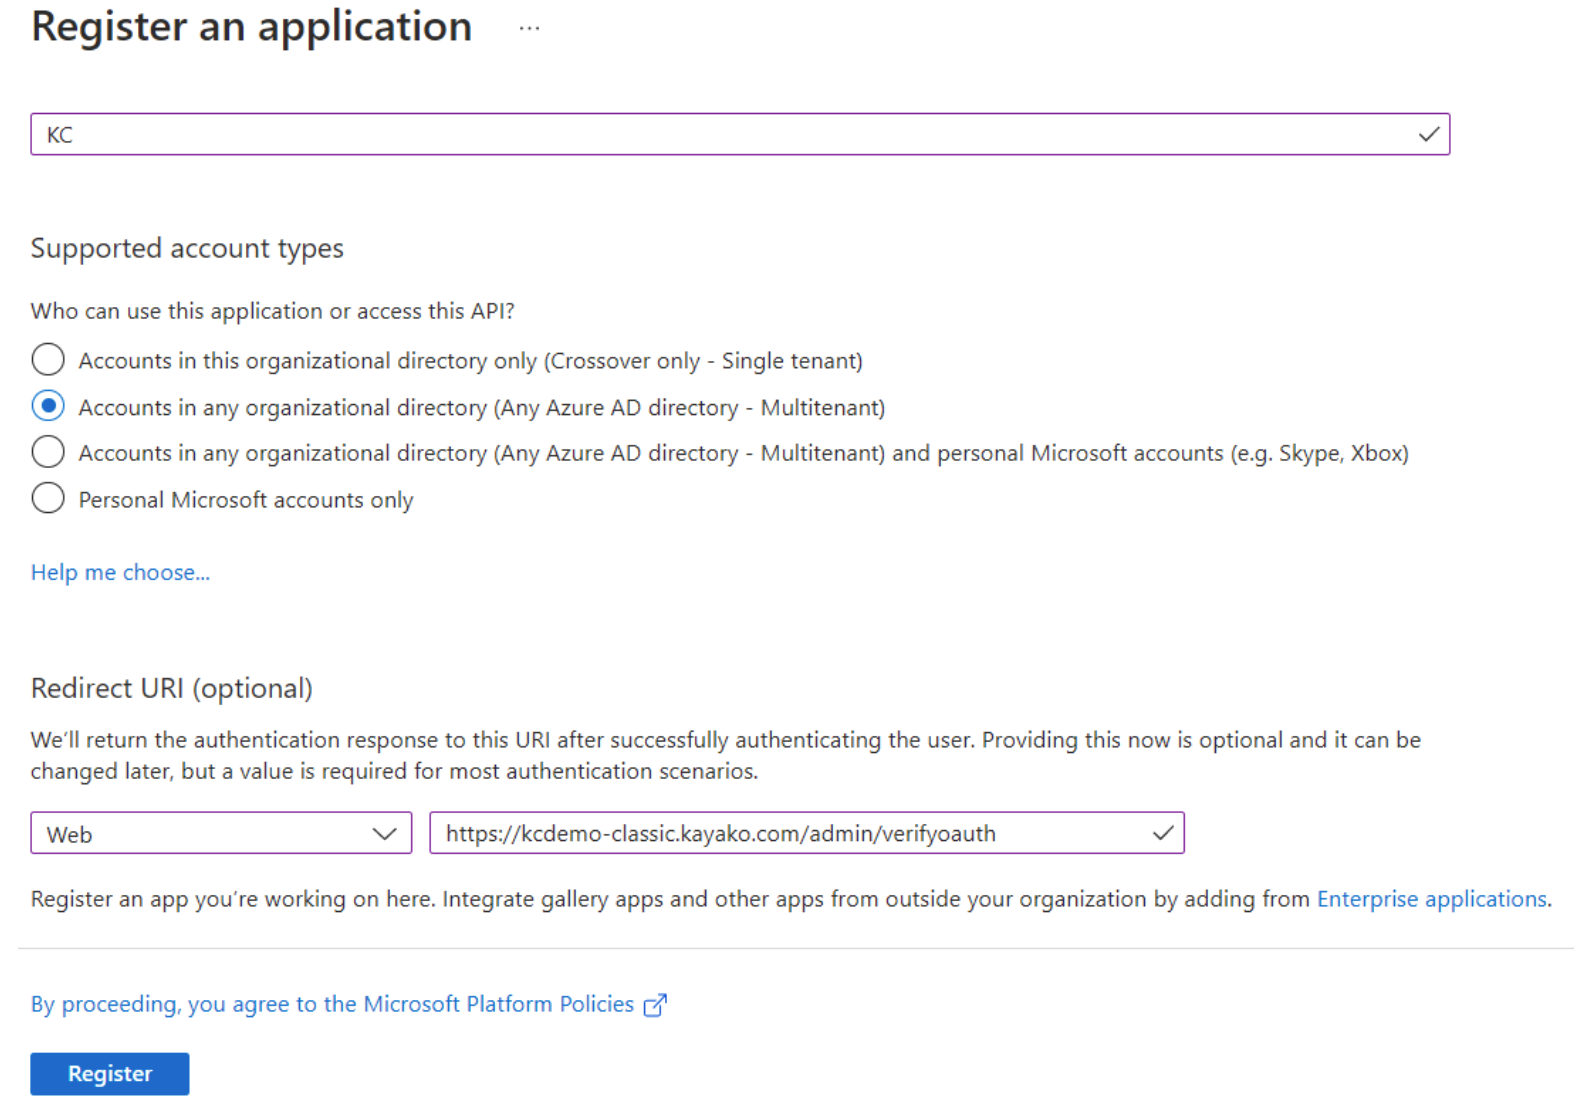
Fill in the details for registering a new application as per the information below:
- Name: Provide any name you may like
- Supported Account Type: Select 2nd option - Accounts in any organizational directory (Any Azure AD directory - Multitenant)
- Redirect URI: For this property select the platform as Web and provide the value as https://<KC-DOMAIN>/admin/verifyoauth. Replace the <KC-DOMAIN> value with your Kayako’s domain
After filling in the following details, click on the Register button
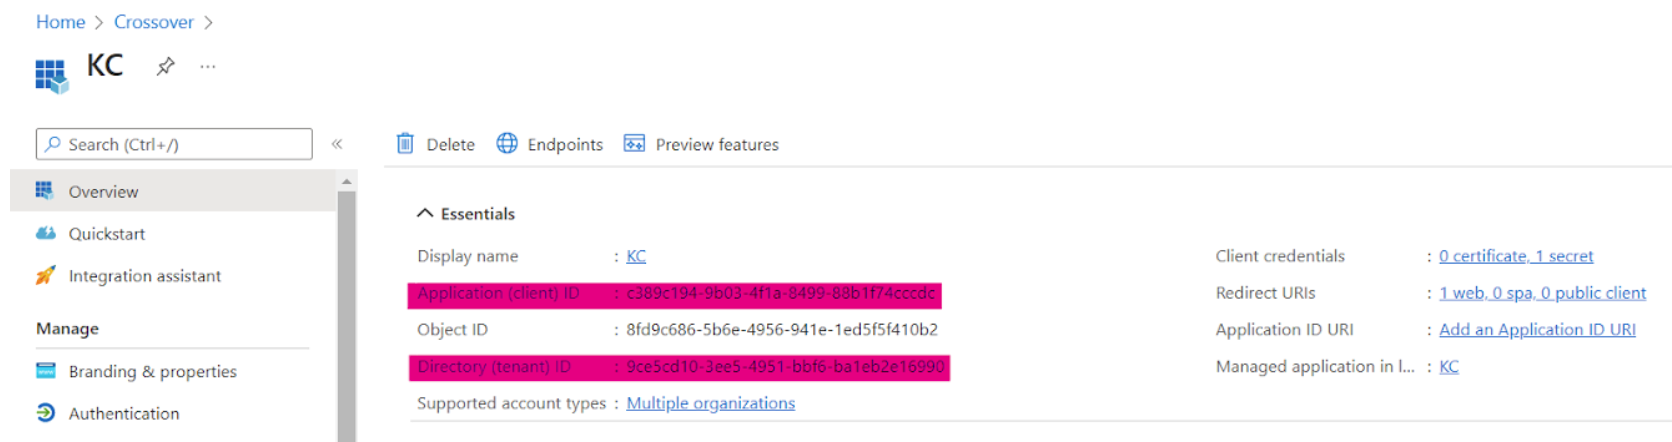
After successfully registering the application you would be presented with a screen as shown in the below screenshot. We would need Application (Client) ID while configuring OAuth in Kayako Classic application.
Step 3: Create Client Secret
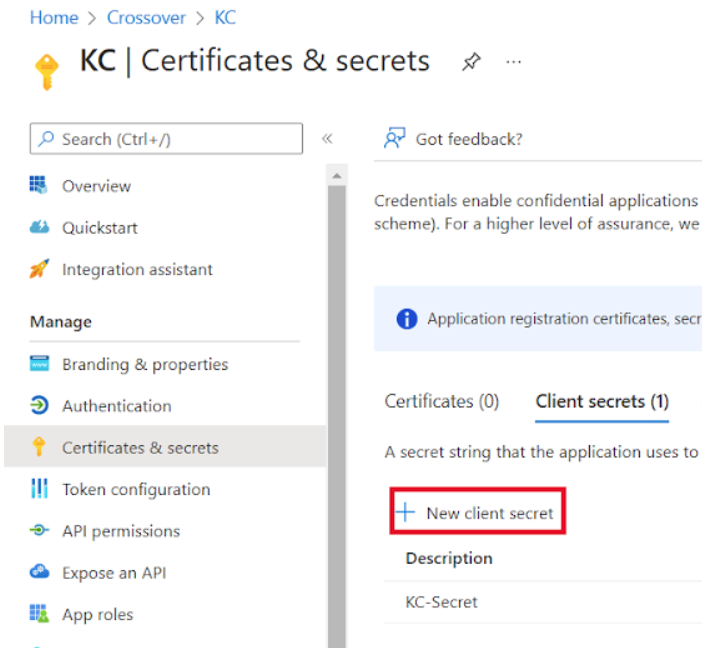
After creating the application, we need to create a client secret for the application. Click on the "0 certificate, 0 secret" link. You should be navigated to the Certificates & Secrets page. Click on New Client Secret as shown in the screenshot below.
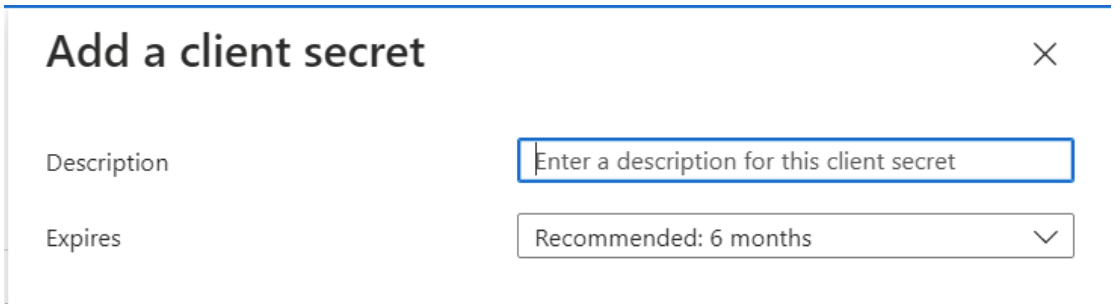
Provide some description and select the value for Expires field from the dropdown.
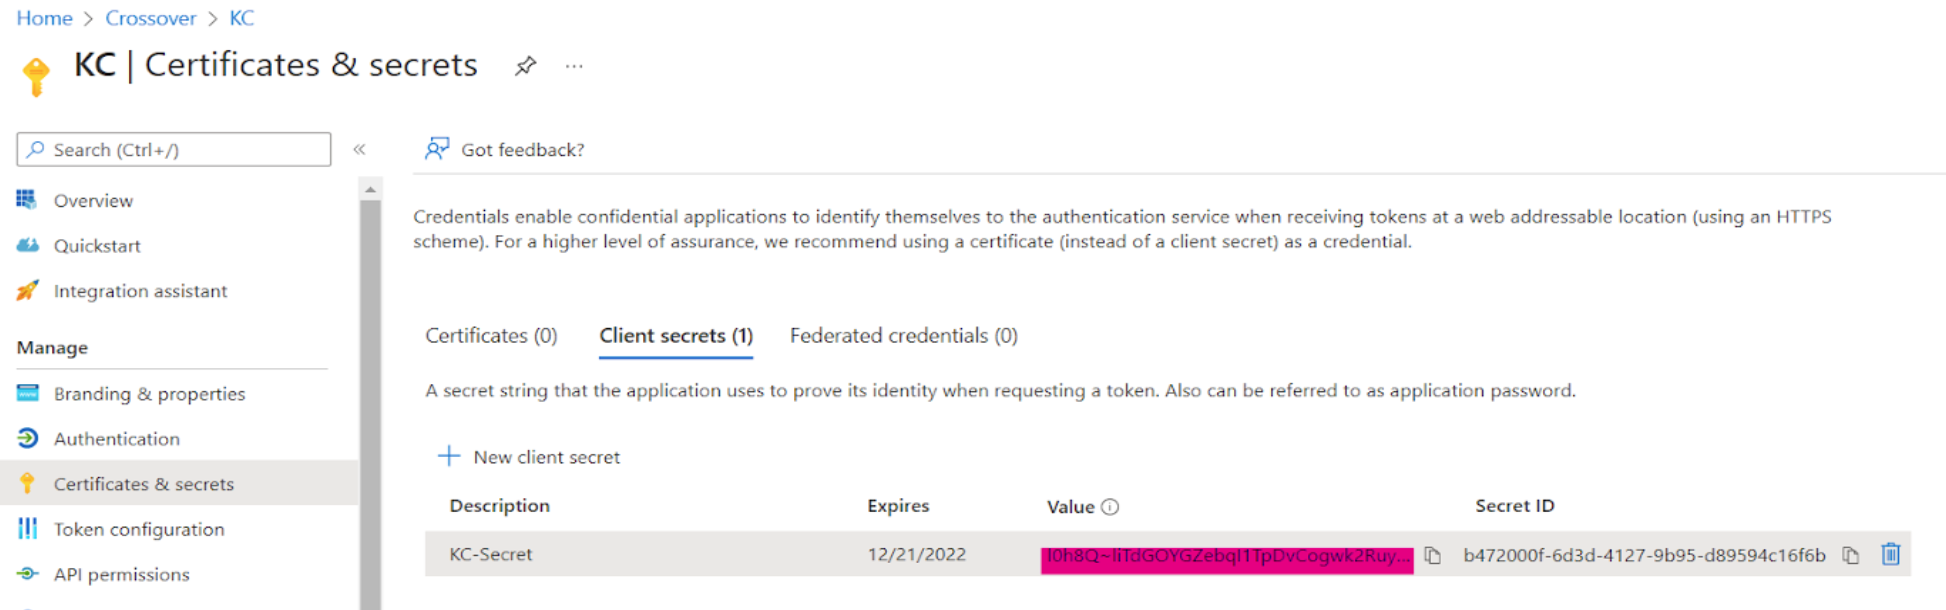
Click on Add button to generate the Client Secret. The Client secret value will be visible ONLY on this screen. Please copy the value and paste it somewhere safe for further reference. Below is the screenshot of the Client Secret. Copy the highlighted value.
Step 4: Enable API Permissions
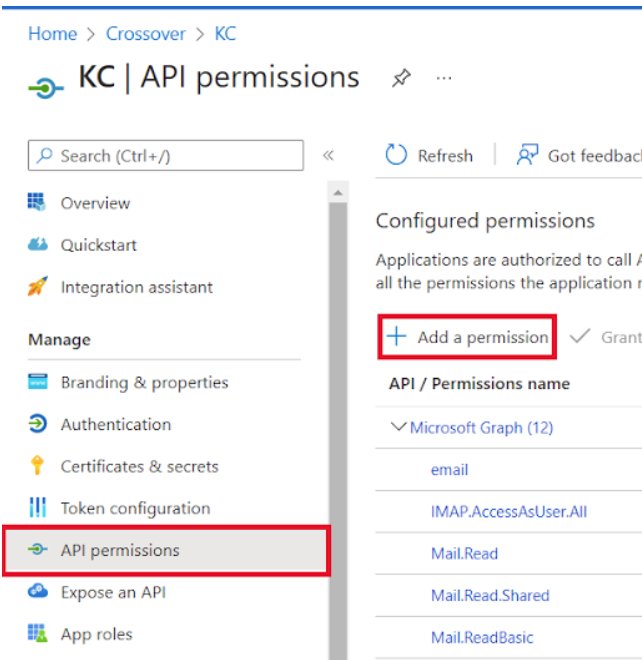
The next step is to enable API permissions so that Kayako Classic app can fetch emails from the server. To enable API permissions, click on the API Permissions menu on the left panel and click on Add a Permission option as shown in the screenshot below
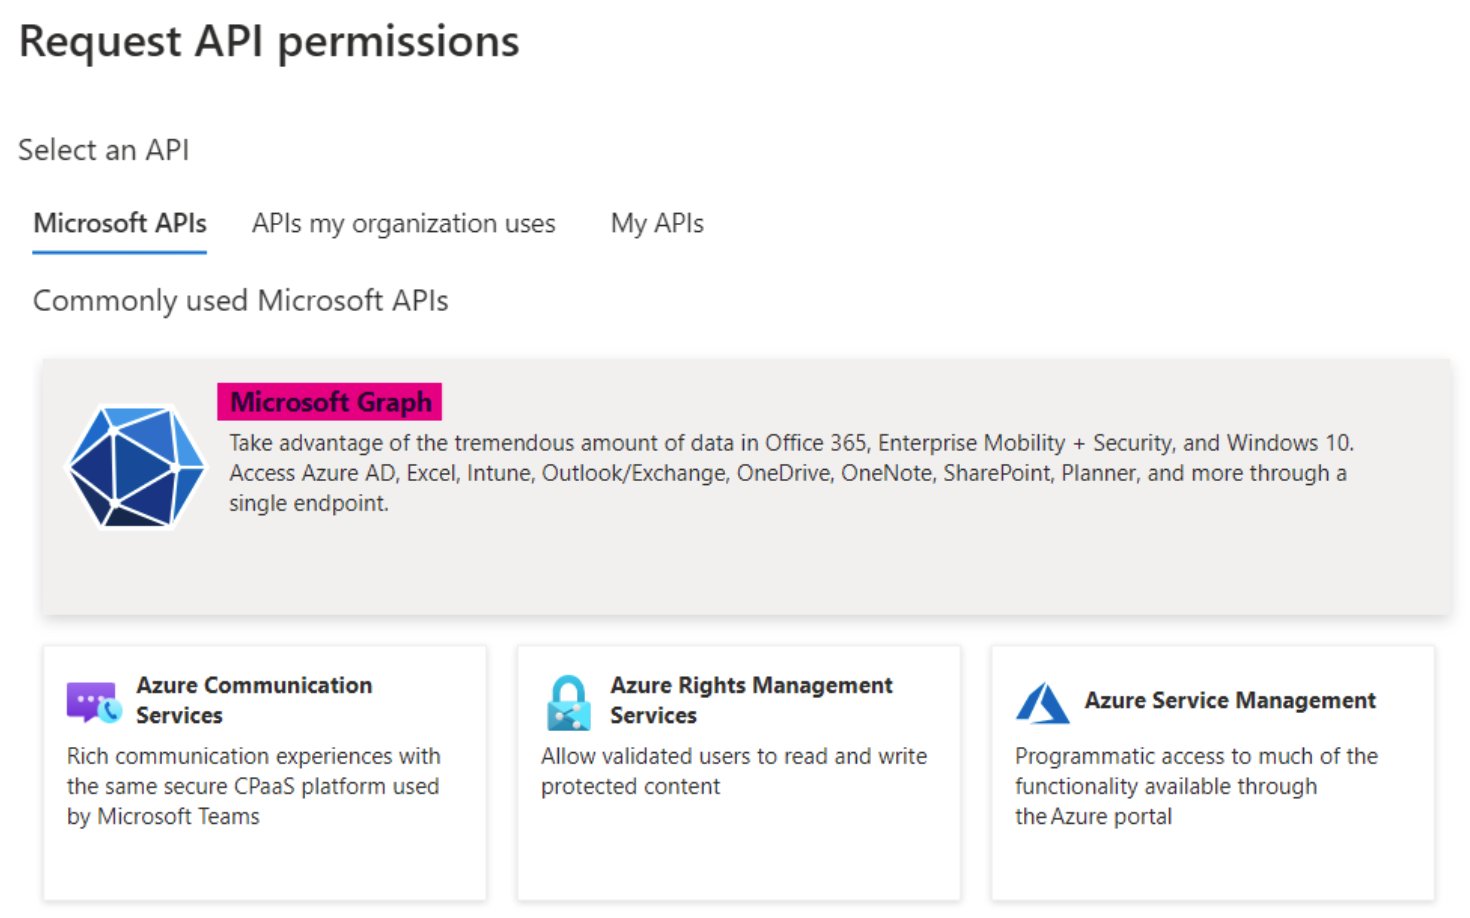
Upon clicking on “Add a Permission” option, you would be presented with a Request API permissions panel from the right. Click on Microsoft Graph as shown below
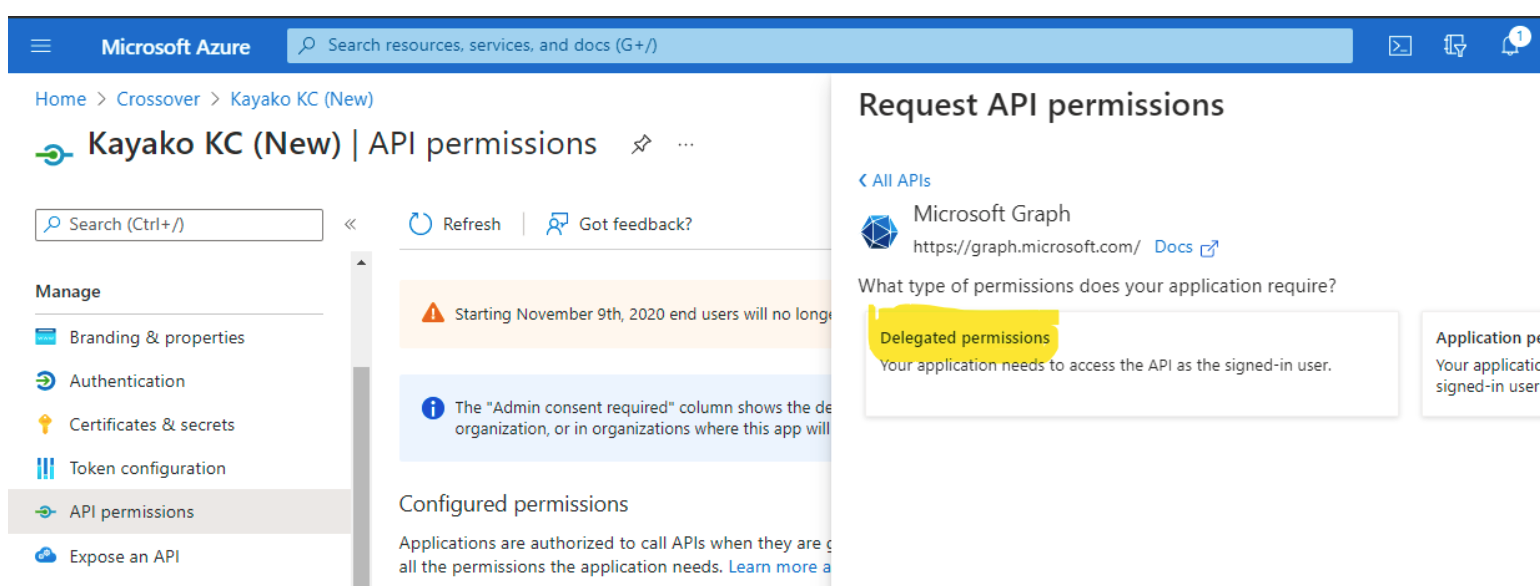
Click on Delegate Permissions
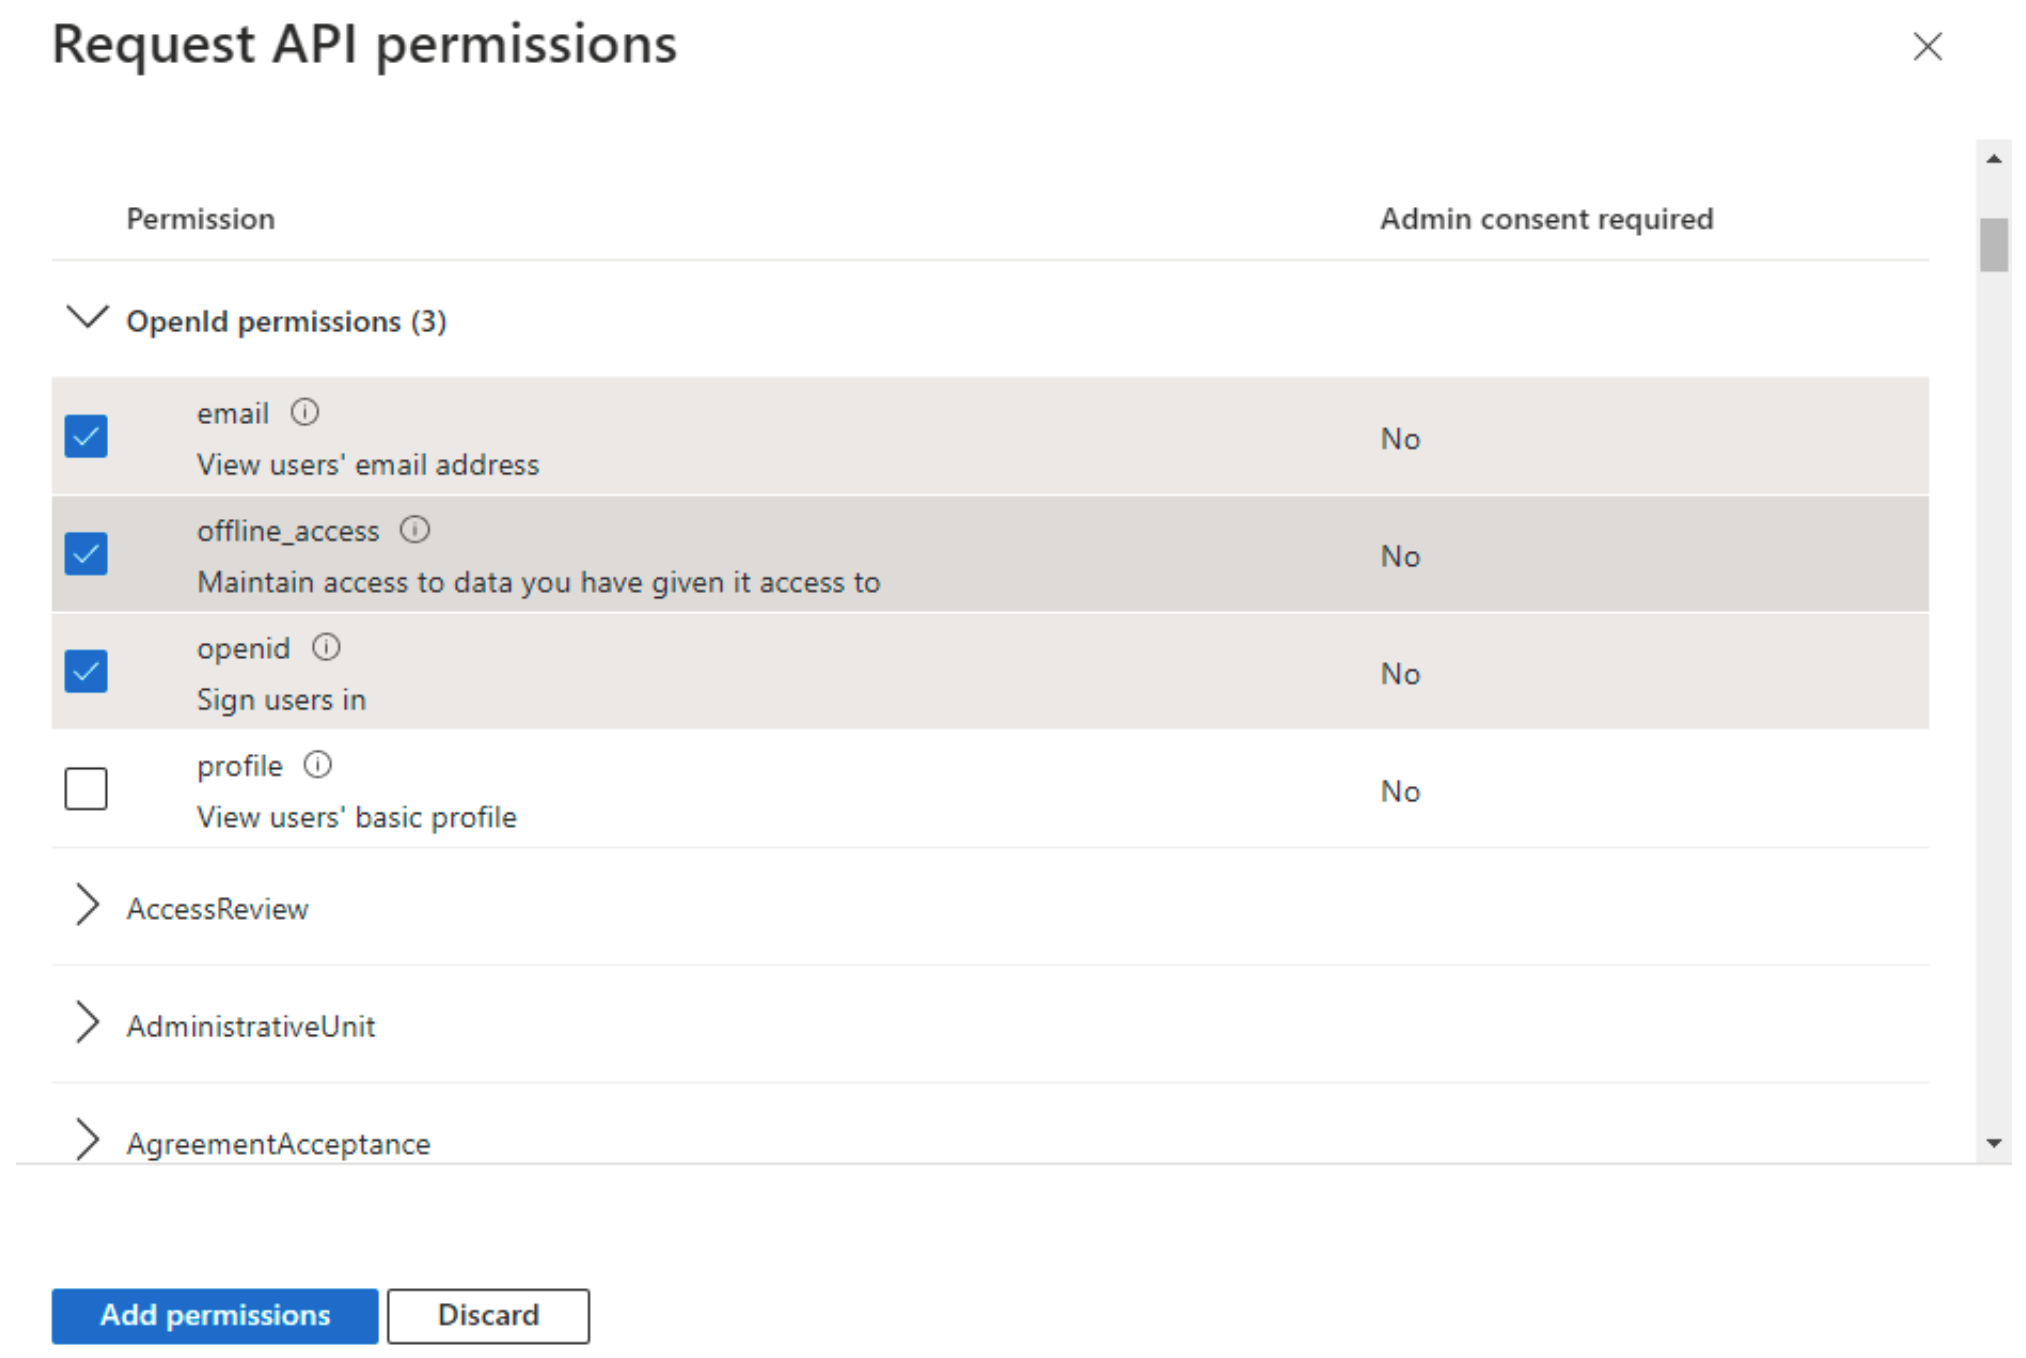
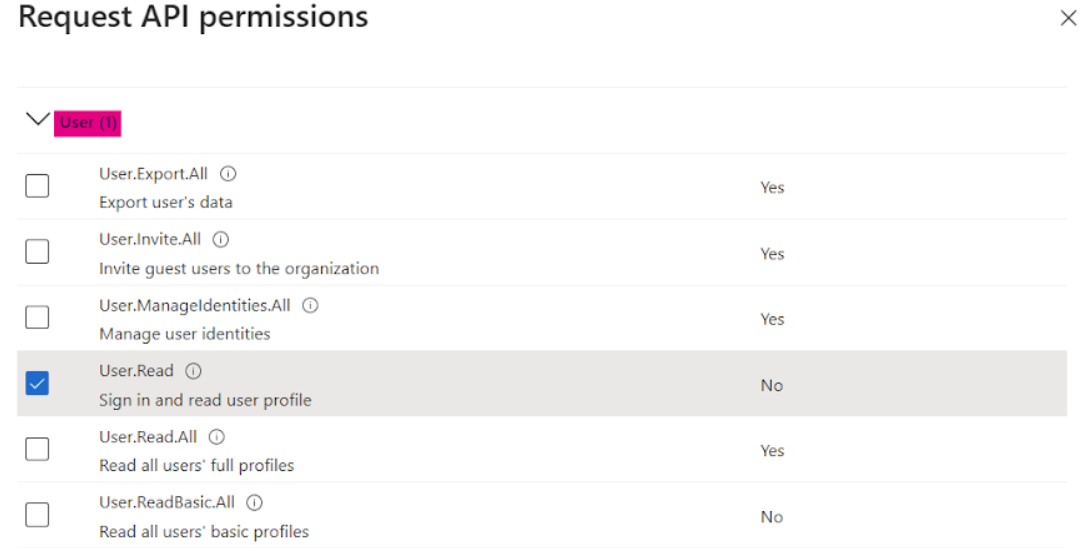
Select the following permisions
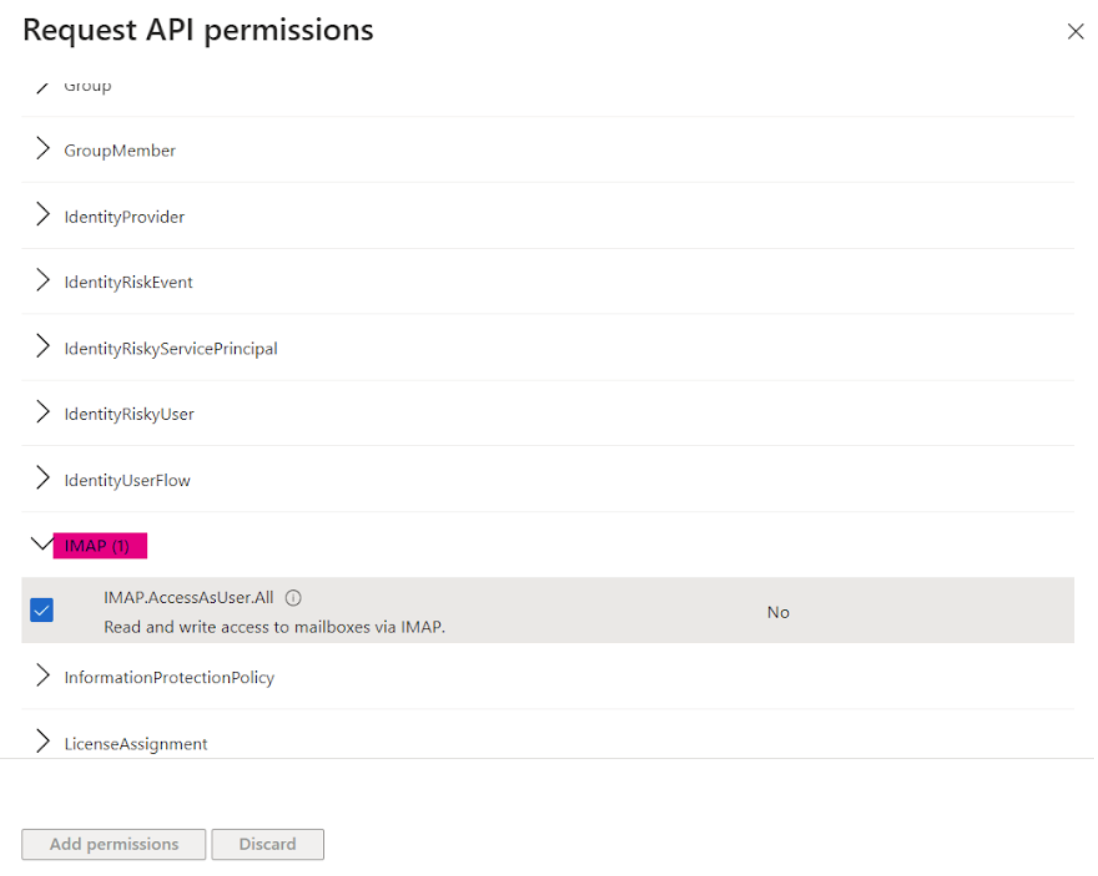
Scroll Down and select all the options under IMAP
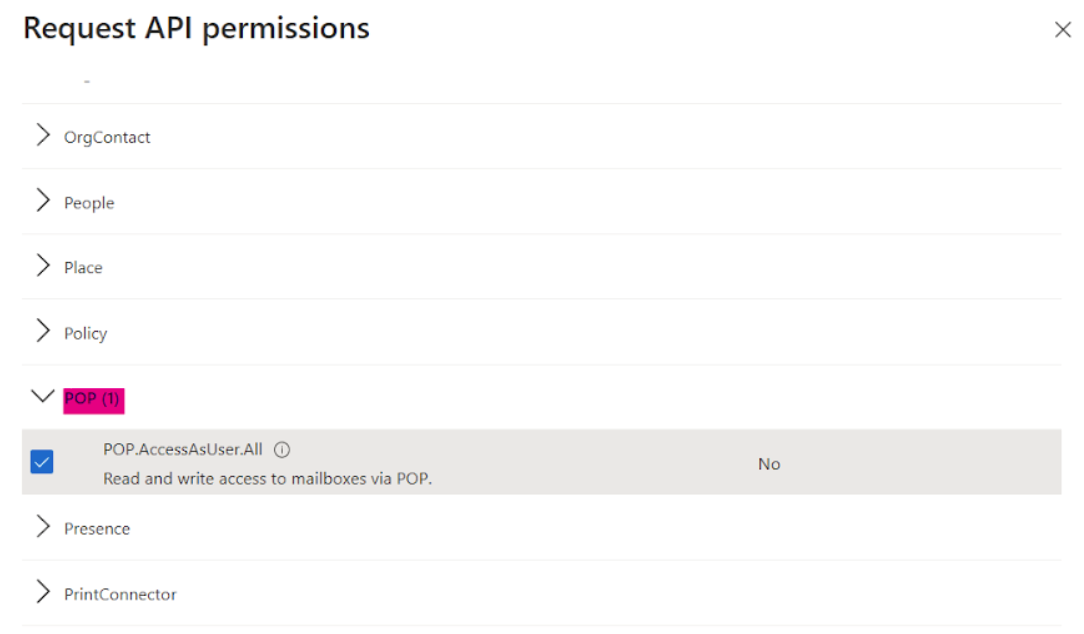
Scroll Down and select all the options under POP
Scroll Down and select all the options under Mail
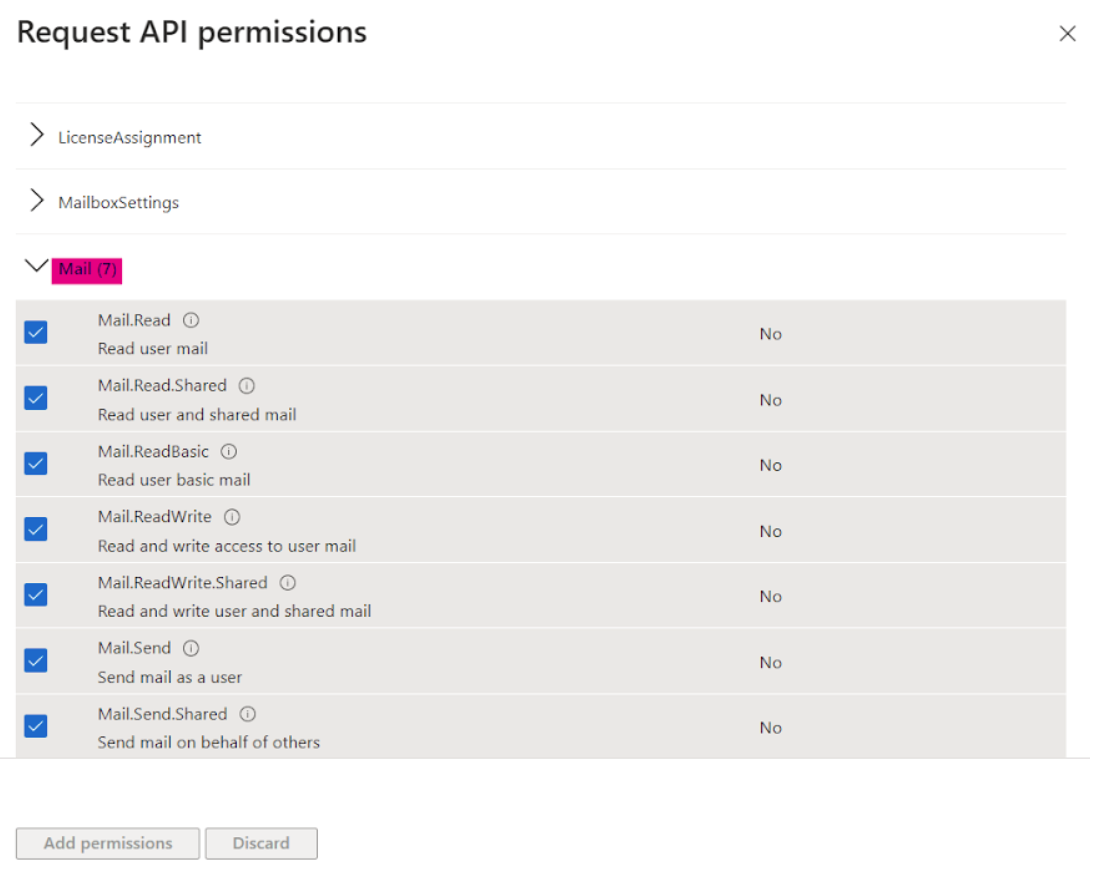
Click on Add Permissions button.
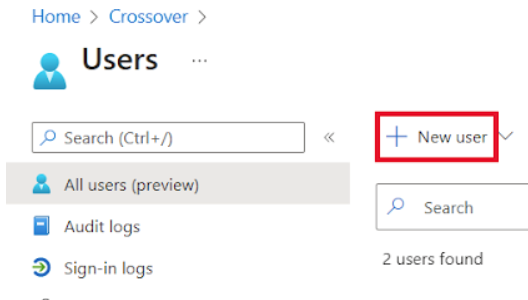
Step 5: Add Support Email as a User
The last step in configuring OAuth setting in Azure Active Directory is to add the support email user in the organization. Select the Users menu in the left panel and click on the New User option as shown below in the screenshot
These are all the settings required in the Azure Active Directory to enable Kayako Classic to read emails. The next step is to configure these settings in Kayako Classic 4.94.7 & above version.
Step 6: Setup Support email in Kayako Admin Panel
After completing the Azure Active Directory setup, you need to configure setting in your Kayako Classic instance to enable Kayako to read and parse email from your Office 365 email. Follow these steps to configure OAuth in Kayako Classic version 4.94.7 and above.
- Login to the your Classic instance as an Admin user and navigate to Admin Panel > Email Parser > Email Queues and click on + New (in the upper right corner) as shown in the screenshot below
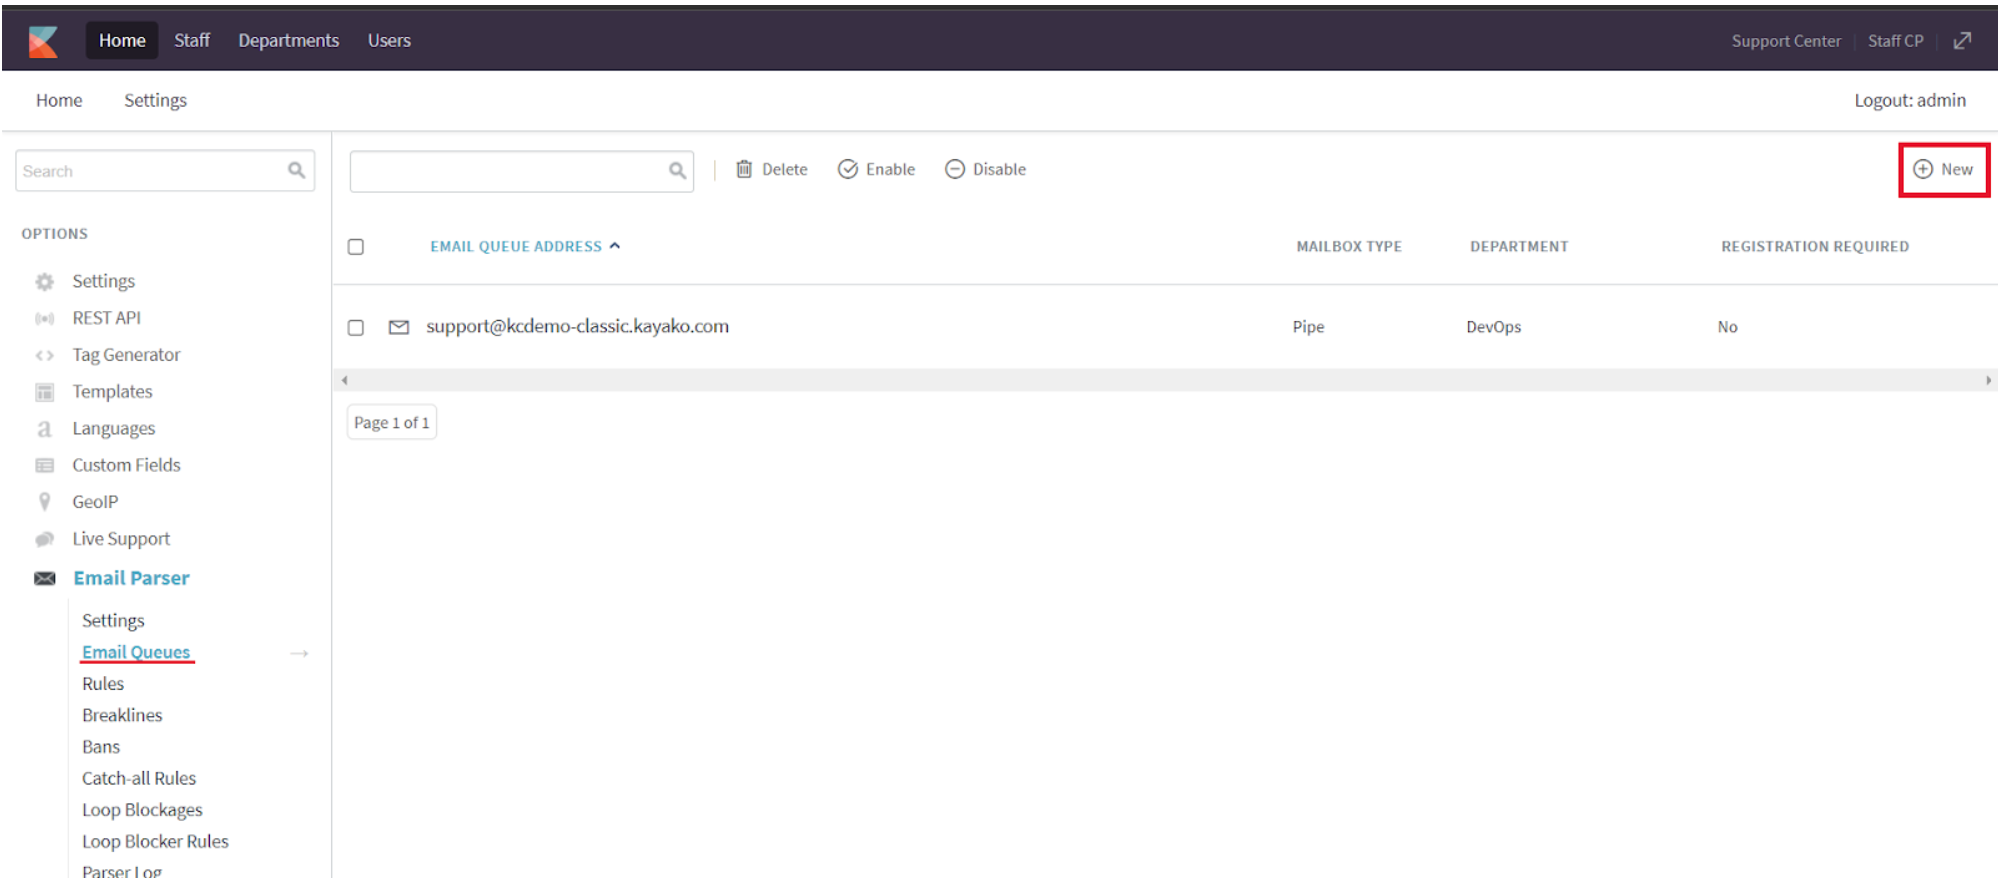
- You would be presented with a screen as shown below
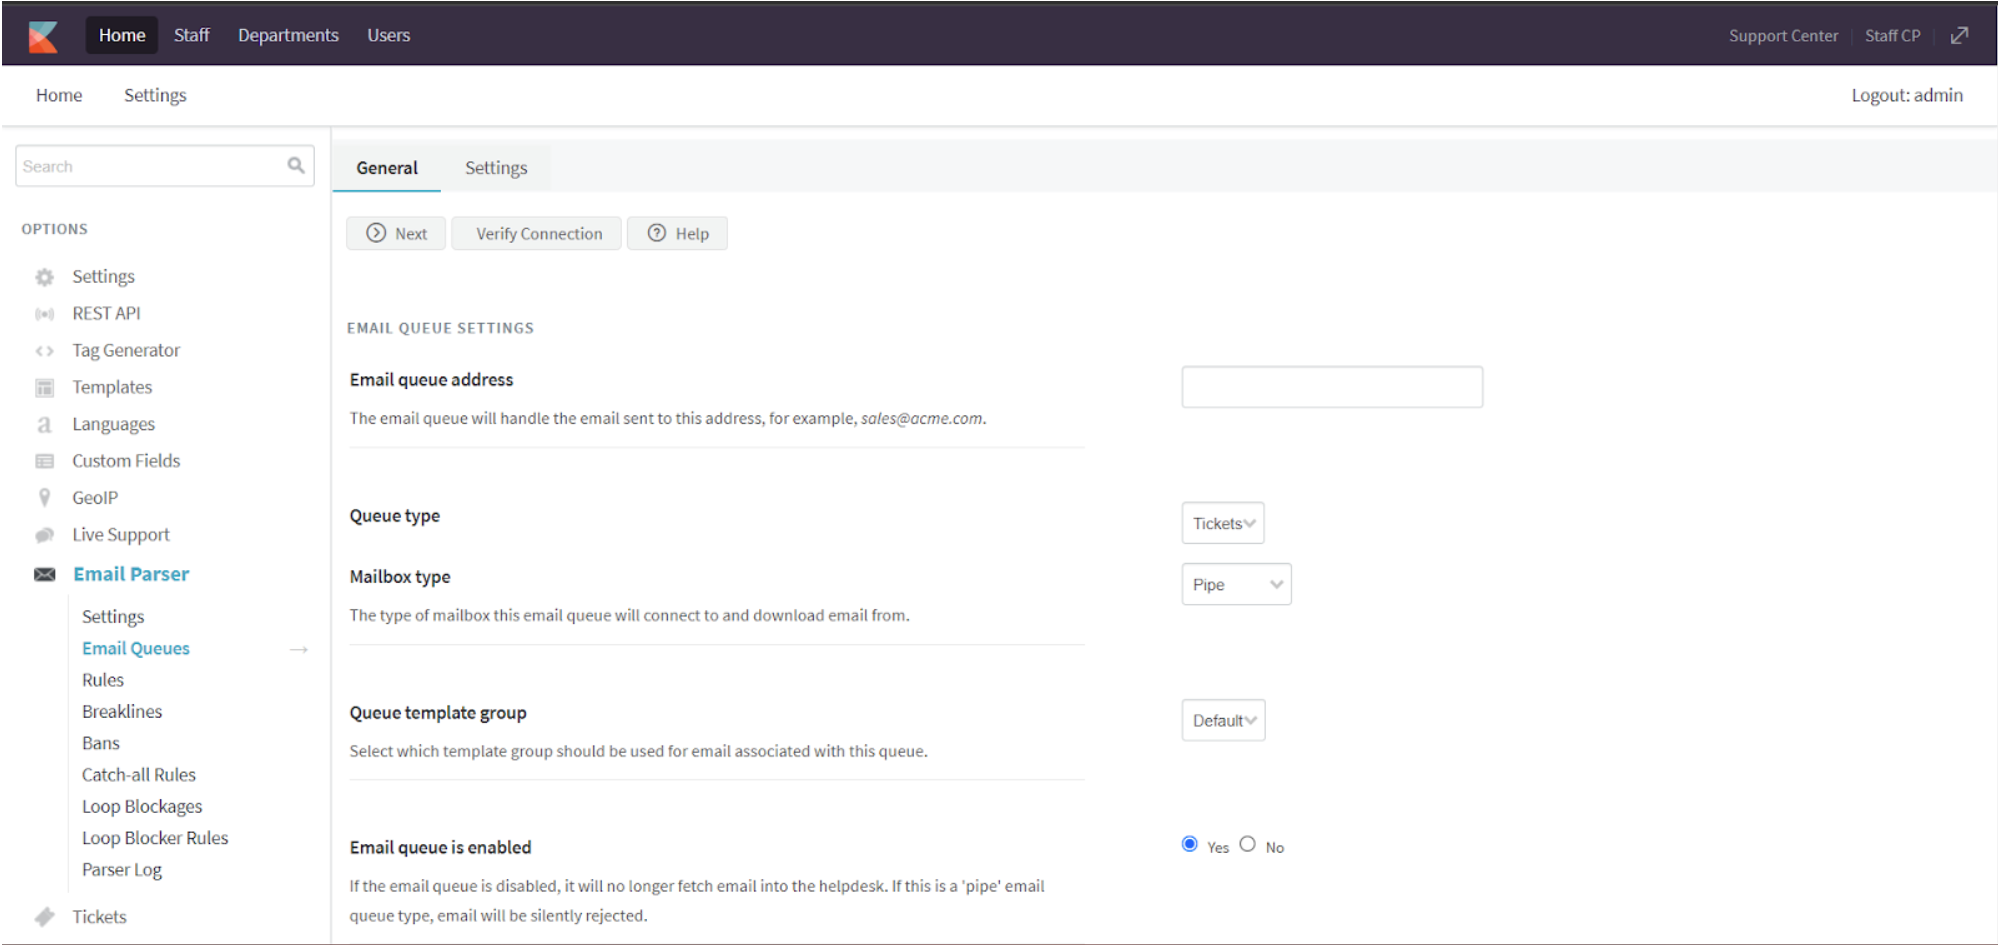
Enter the values for the properties based on the information provided below
Enter queue address: Your support email
Mailbox type: Select POP3 SSL or IMAP SSL
Mailserver hostname: outlook.office365.com
Port Number: 993
Authentication Type: OAuth
Client Id: Provide the value obtained in Step 2
Client Secret: Provide the Client secret value obtained in Step 3
Authorization Endpoint: The value for this parameter is a URL as mentioned below. In the below URL, replace the <TENANT_ID> with your Tenant ID value obtained in Step 1
https://login.microsoftonline.com/<TENANT_ID>/oauth2/v2.0/authorize
Token Endpoint: The value for this parameter is a URL as mentioned below. In the below URL, replace the <TENANT_ID> with your Tenant ID value obtained in Step 1
https://login.microsoftonline.com/<TENANT_ID>/oauth2/v2.0/token
Authorization Scope (make sure ALL scopes are included for each connection type):
- for IMAP SSL connection:
openid email offline_access https://outlook.office.com/IMAP.AccessAsUser.All https://outlook.office.com/Mail.Send - for POP3 SSL connection:
openid email offline_access https://outlook.office.com/POP.AccessAsUser.All https://outlook.office.com/Mail.Send
Ignore recipient addresses and force into queue: Yes (in order to capture all emails coming into the mailbox)
Use the same mailserver to send email: Yes
SMTP connection type: SSL (Depends on the email setup on the client's end)
-
Scroll all the way up to the page and click on Verify Connection
- This step is required in order to actually authenticate into the O365 tenant, as this is what triggers the oAuth workflow on the O365 side and is responsible for authorizing Kayako for oAuth connectivity.
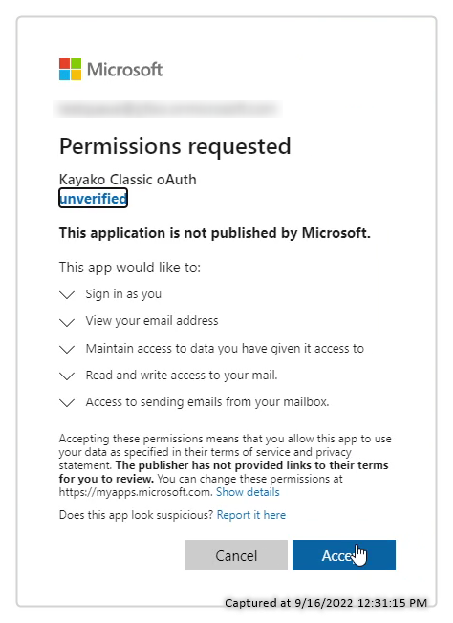
- Clicking the Verify Connection button will open a new window where you are required to authenticate into O365 using the chosen account (email queue address) for the connection, and follow the indicated steps.
The actual information displayed on this authentication screen depends on your O365 tenant settings (it may require additional admin consents to be provided). - If a new tab opens with a login.microsoftonline.com, that has a &prompt=consent parameter at the end. Remove the &prompt=consent part of the URL and press Enter on the keyboard to reload the authorization workflow without prompting for an admin consent, which will allow you to finish the configuration in Kayako.
- After successfully authorizing your account for oAuth in Kayako you will be returned to the previous window, where you need to click on the NEXT button at the top of the page and you should see the following page (if you are modifying the existing queue, please press the "Update" button)
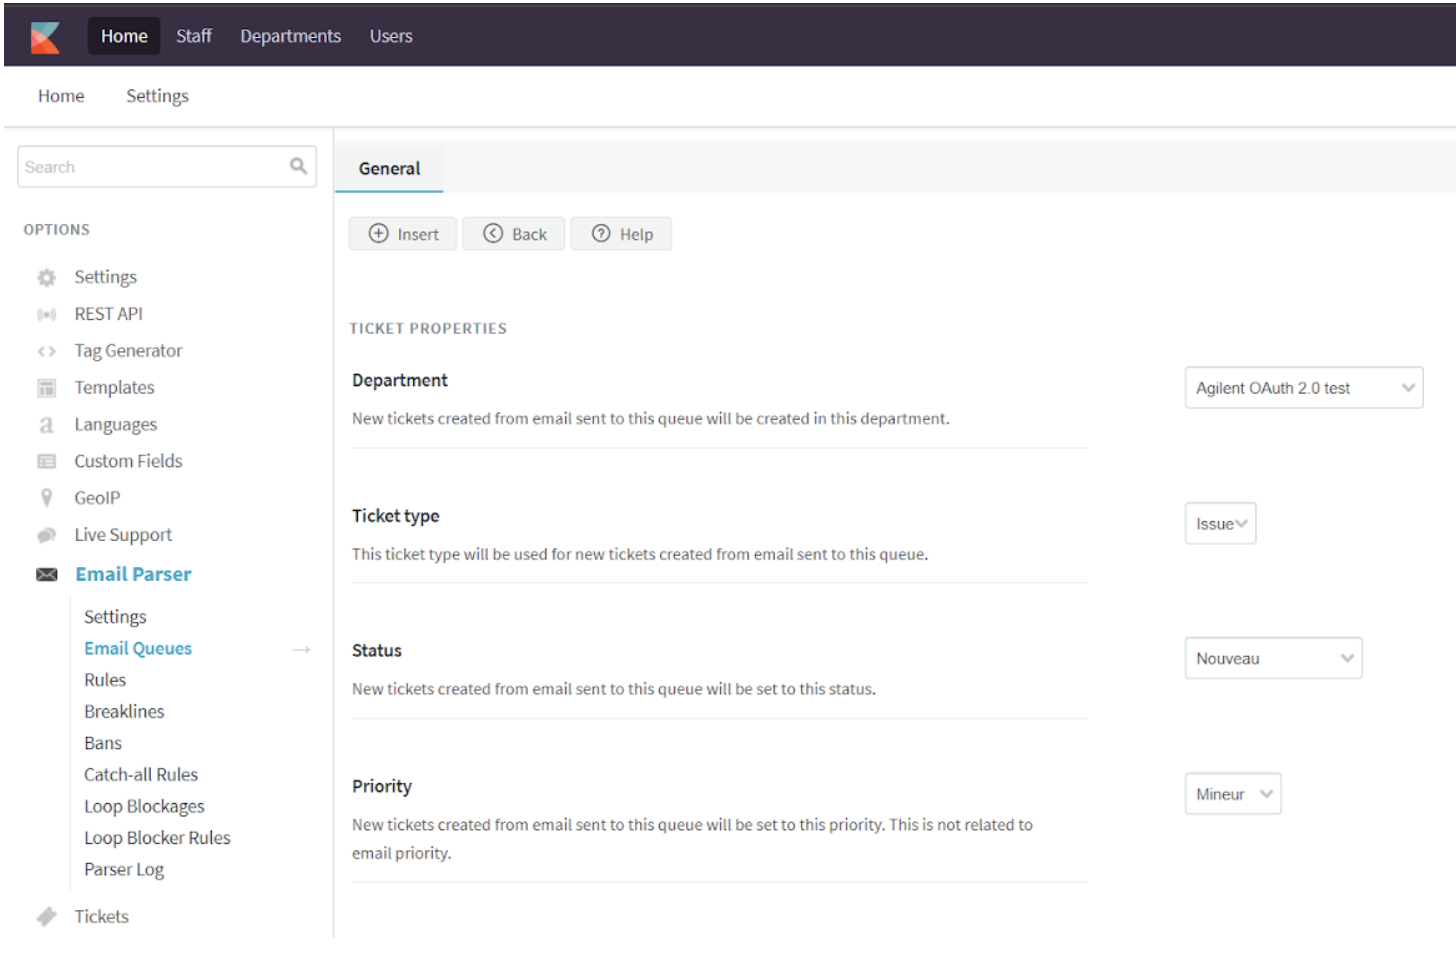
Enter the values for the properties based on the information provided below and click INSERT to finish the setup
Department: Select the department in which tickets should be created
Ticket type: Select the ticket type for the new tickets
Status: Select the default status for the new tickets
Priority: Select the default priority for the new tickets
Note: The below two articles are known to resolve issues with IIS
- "Blank screen" https://stackoverflow.com/questions/11636386/how-to-configure-the-web-config-to-allow-requests-of-any-length
-
"Received access token -" https://martinsblog.dk/windows-iis-with-php-curl-60-ssl-certificate-problem-unable-to-get-local-issuer-certificate/
- to note the fact that the solution here does not apply ONLY for IIS, but for any web server used in Windows OS
- if there are multiple PHP versions installed on the Kayako server, please make sure to apply the fix above in the correct php.ini file; the correct file can be found by running phpinfo on the server, and searching for the Loaded Configuration File section
Note 2: General troubleshooting
- Pressing the "Update" button after the "Verify connection" is a mandatory step that saves the token in the "swemailqueues" table
- Some customer may encounter a "AutoExecute Query: AutoExecute Query: UPDATE swemailqueues" when their access tokens are bigger than the column size. The below SQL query will fix the issue.
- ALTER TABLE swemailqueues CHANGE accesstoken accesstoken VARCHAR(6000) CHARACTER SET utf8 COLLATE utf8_unicode_ci NOT NULL DEFAULT '', CHANGE refreshtoken refreshtoken VARCHAR(6000) CHARACTER SET utf8 COLLATE utf8_unicode_ci NOT NULL DEFAULT '';
- The current lenght of the token can be examined in the F12 console in the network tab. After pressing the "Update" button the token could be seen in the last query to the "/Parser/EmailQueue/EditSubmit/1"
- "Received ID token with user email address -" error during the verification. This is usually experienced when the "openid email offline_access" is not added to the "Authorization Scope"
- HTTPS is a must for the OAuth configuration, unless the "localhost" is used in the URL (i.e. it is a test environment).
Priyanka Bhotika
Comments