 Go to Kayako
Overview
Customizing the templates that govern your notification emails allows you to personalize the content that appears in each email. This can be very useful when choosing which content is most relevant to your staff versus your customers. This article will give you a quick overview of notification email templates and how the customization process works. It will also walk you through the steps you need to follow to personalize your own email notification templates.
Information
Email Template Variables
Most outgoing emails from Kayako are rendered through their respective email templates. Generally, these templates include language phrases, plain text, HTML/CSS, logical statements, and template variables. Basically, it means that you have a lot of options for controlling how the notifications will appear to you and your customers.
Variables can be used in email templates to fill in specific content elements related to either a user or a ticket. So, for example, if you want each notification email to start with Dear [Customer's Name], you can use a variable in the email template to supply the Customer Name for each recipient.
The notification email templates we're going to be discussing here are the staff notification template and the user notification template. Additionally, each template has two versions: an HTML version and a plain text version. You can set your preference for which format to use in the admin control panel, and then modify the matching template.
Finally, it's important to note that each of these starts out with just a single variable, called either $_notificationContentsHTML or $_notificationContentsText, depending on the template. These variables contain the default contents of your notification emails. If you ever want to restore the default contents for your emails, you can just delete your changes and replace them the default variable.
Modifying Notification Email Templates
You can customize your notification template by following these steps:
-
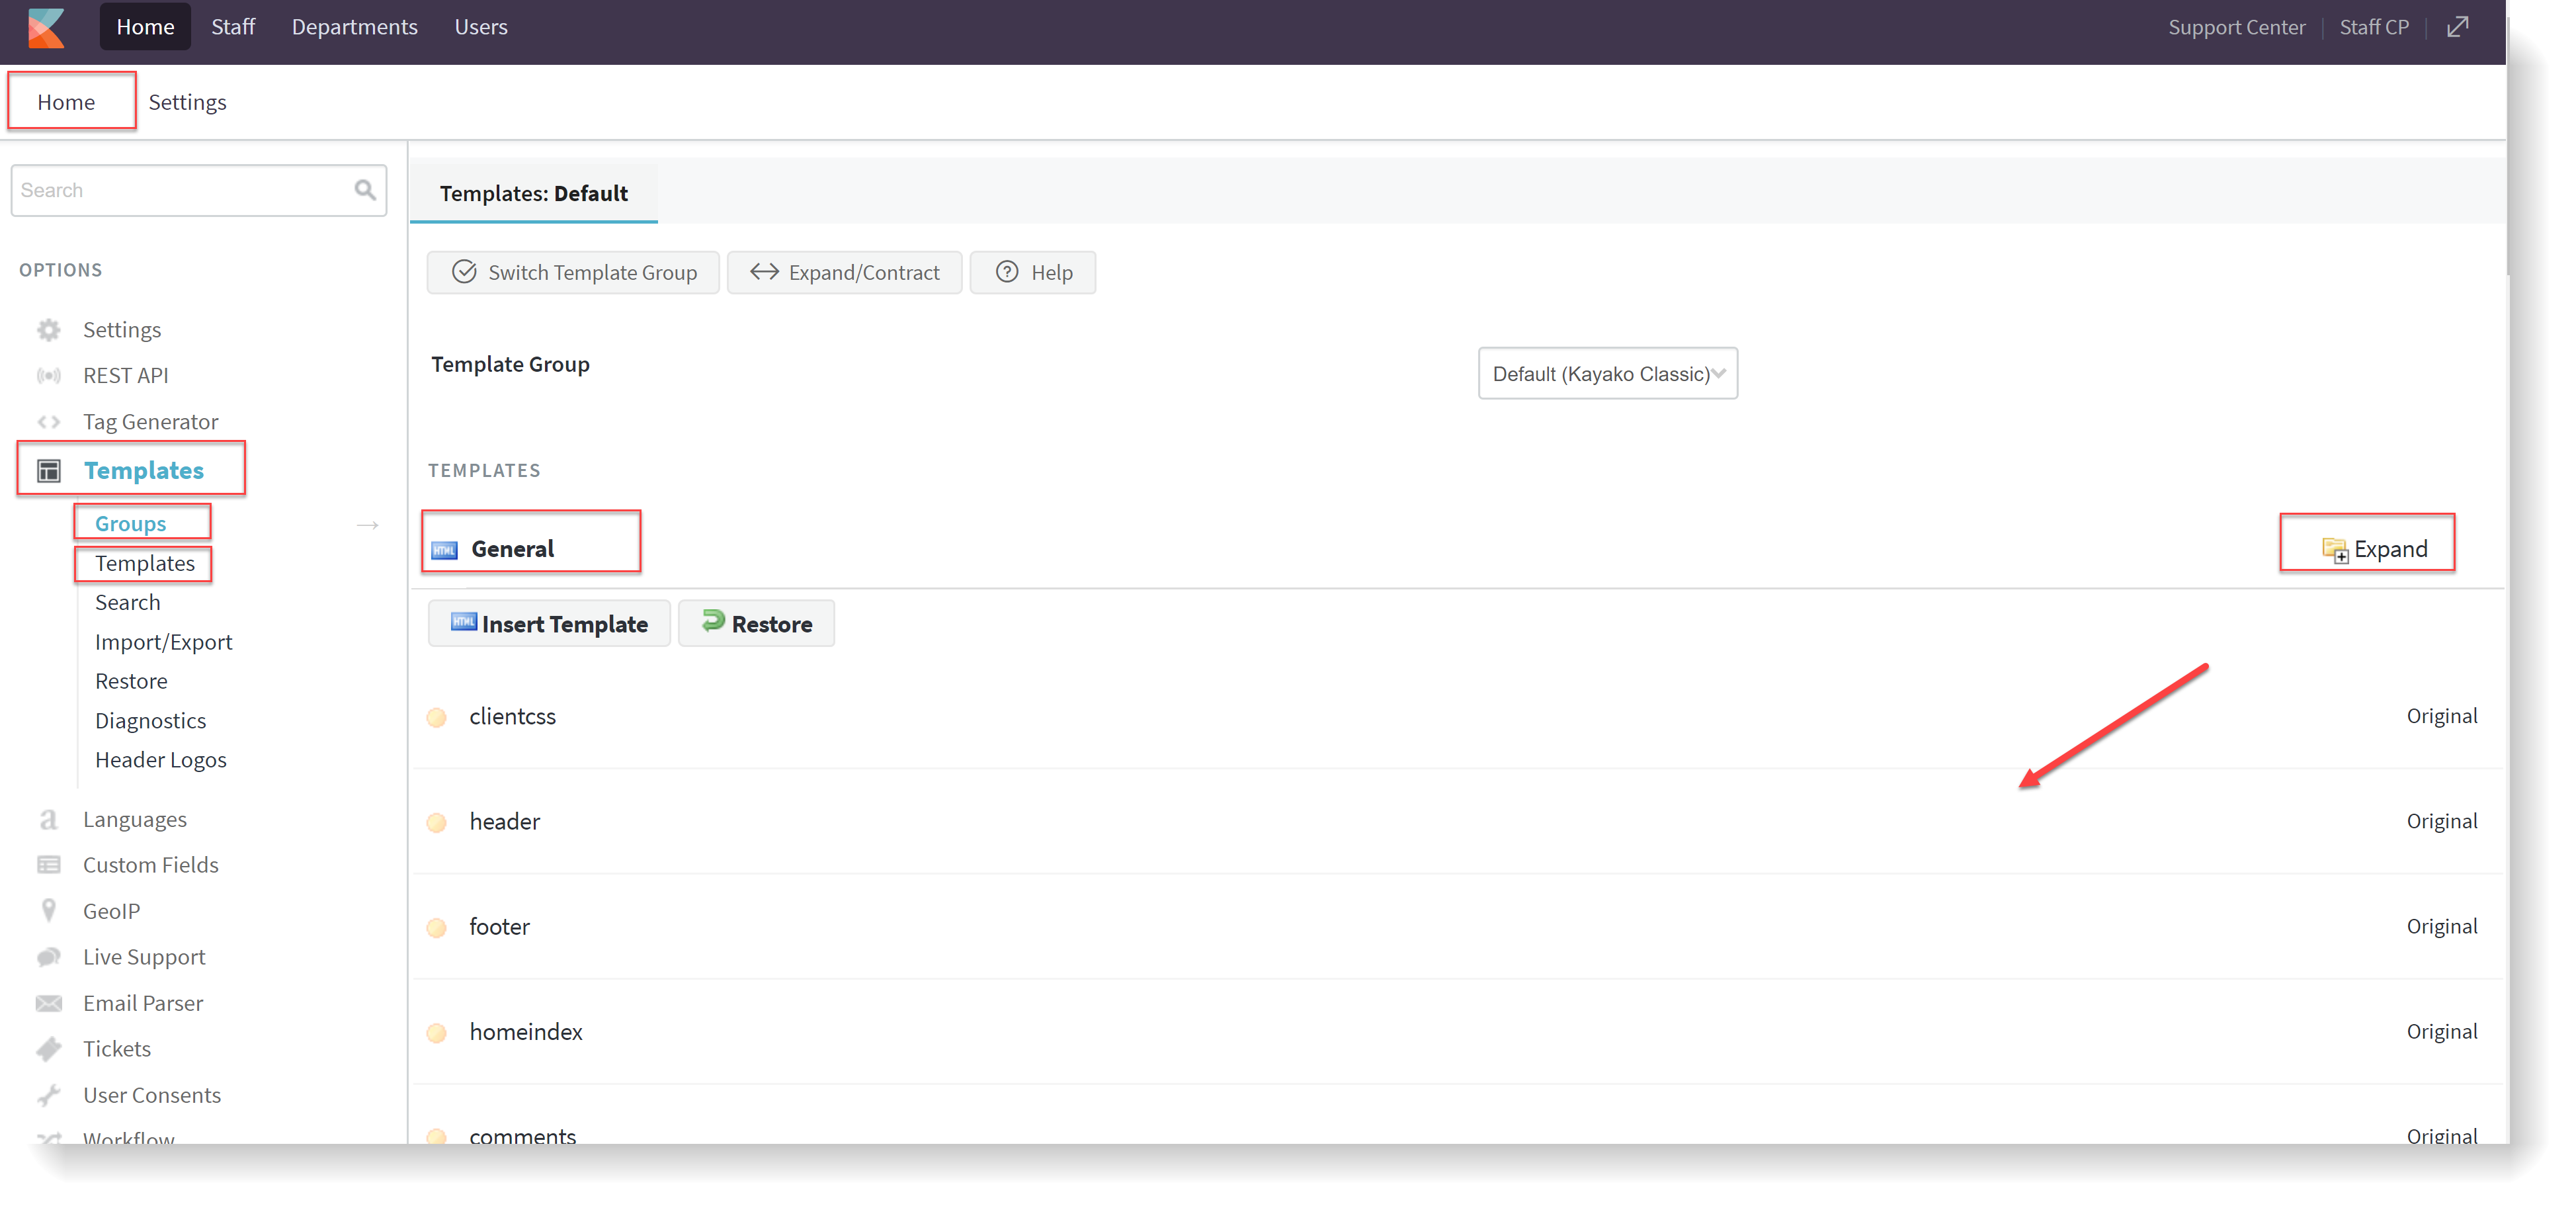
Log in to the Kayako admin control panel.
-
Click on Templates in the left navigation bar.
-
Under that, click Groups and select the template group you're going to work on.
-
In the Edit Template Group window that opens, click the Templates button.
-
Click General to expand the category.
Note: We're going to start with the staff notification templates, which are called emailnotification_text for plain text emails and emailnotification_html for HTML emails.
-
Let's start with emailnotification_text. Click on it from the list to open the template for editing.
-
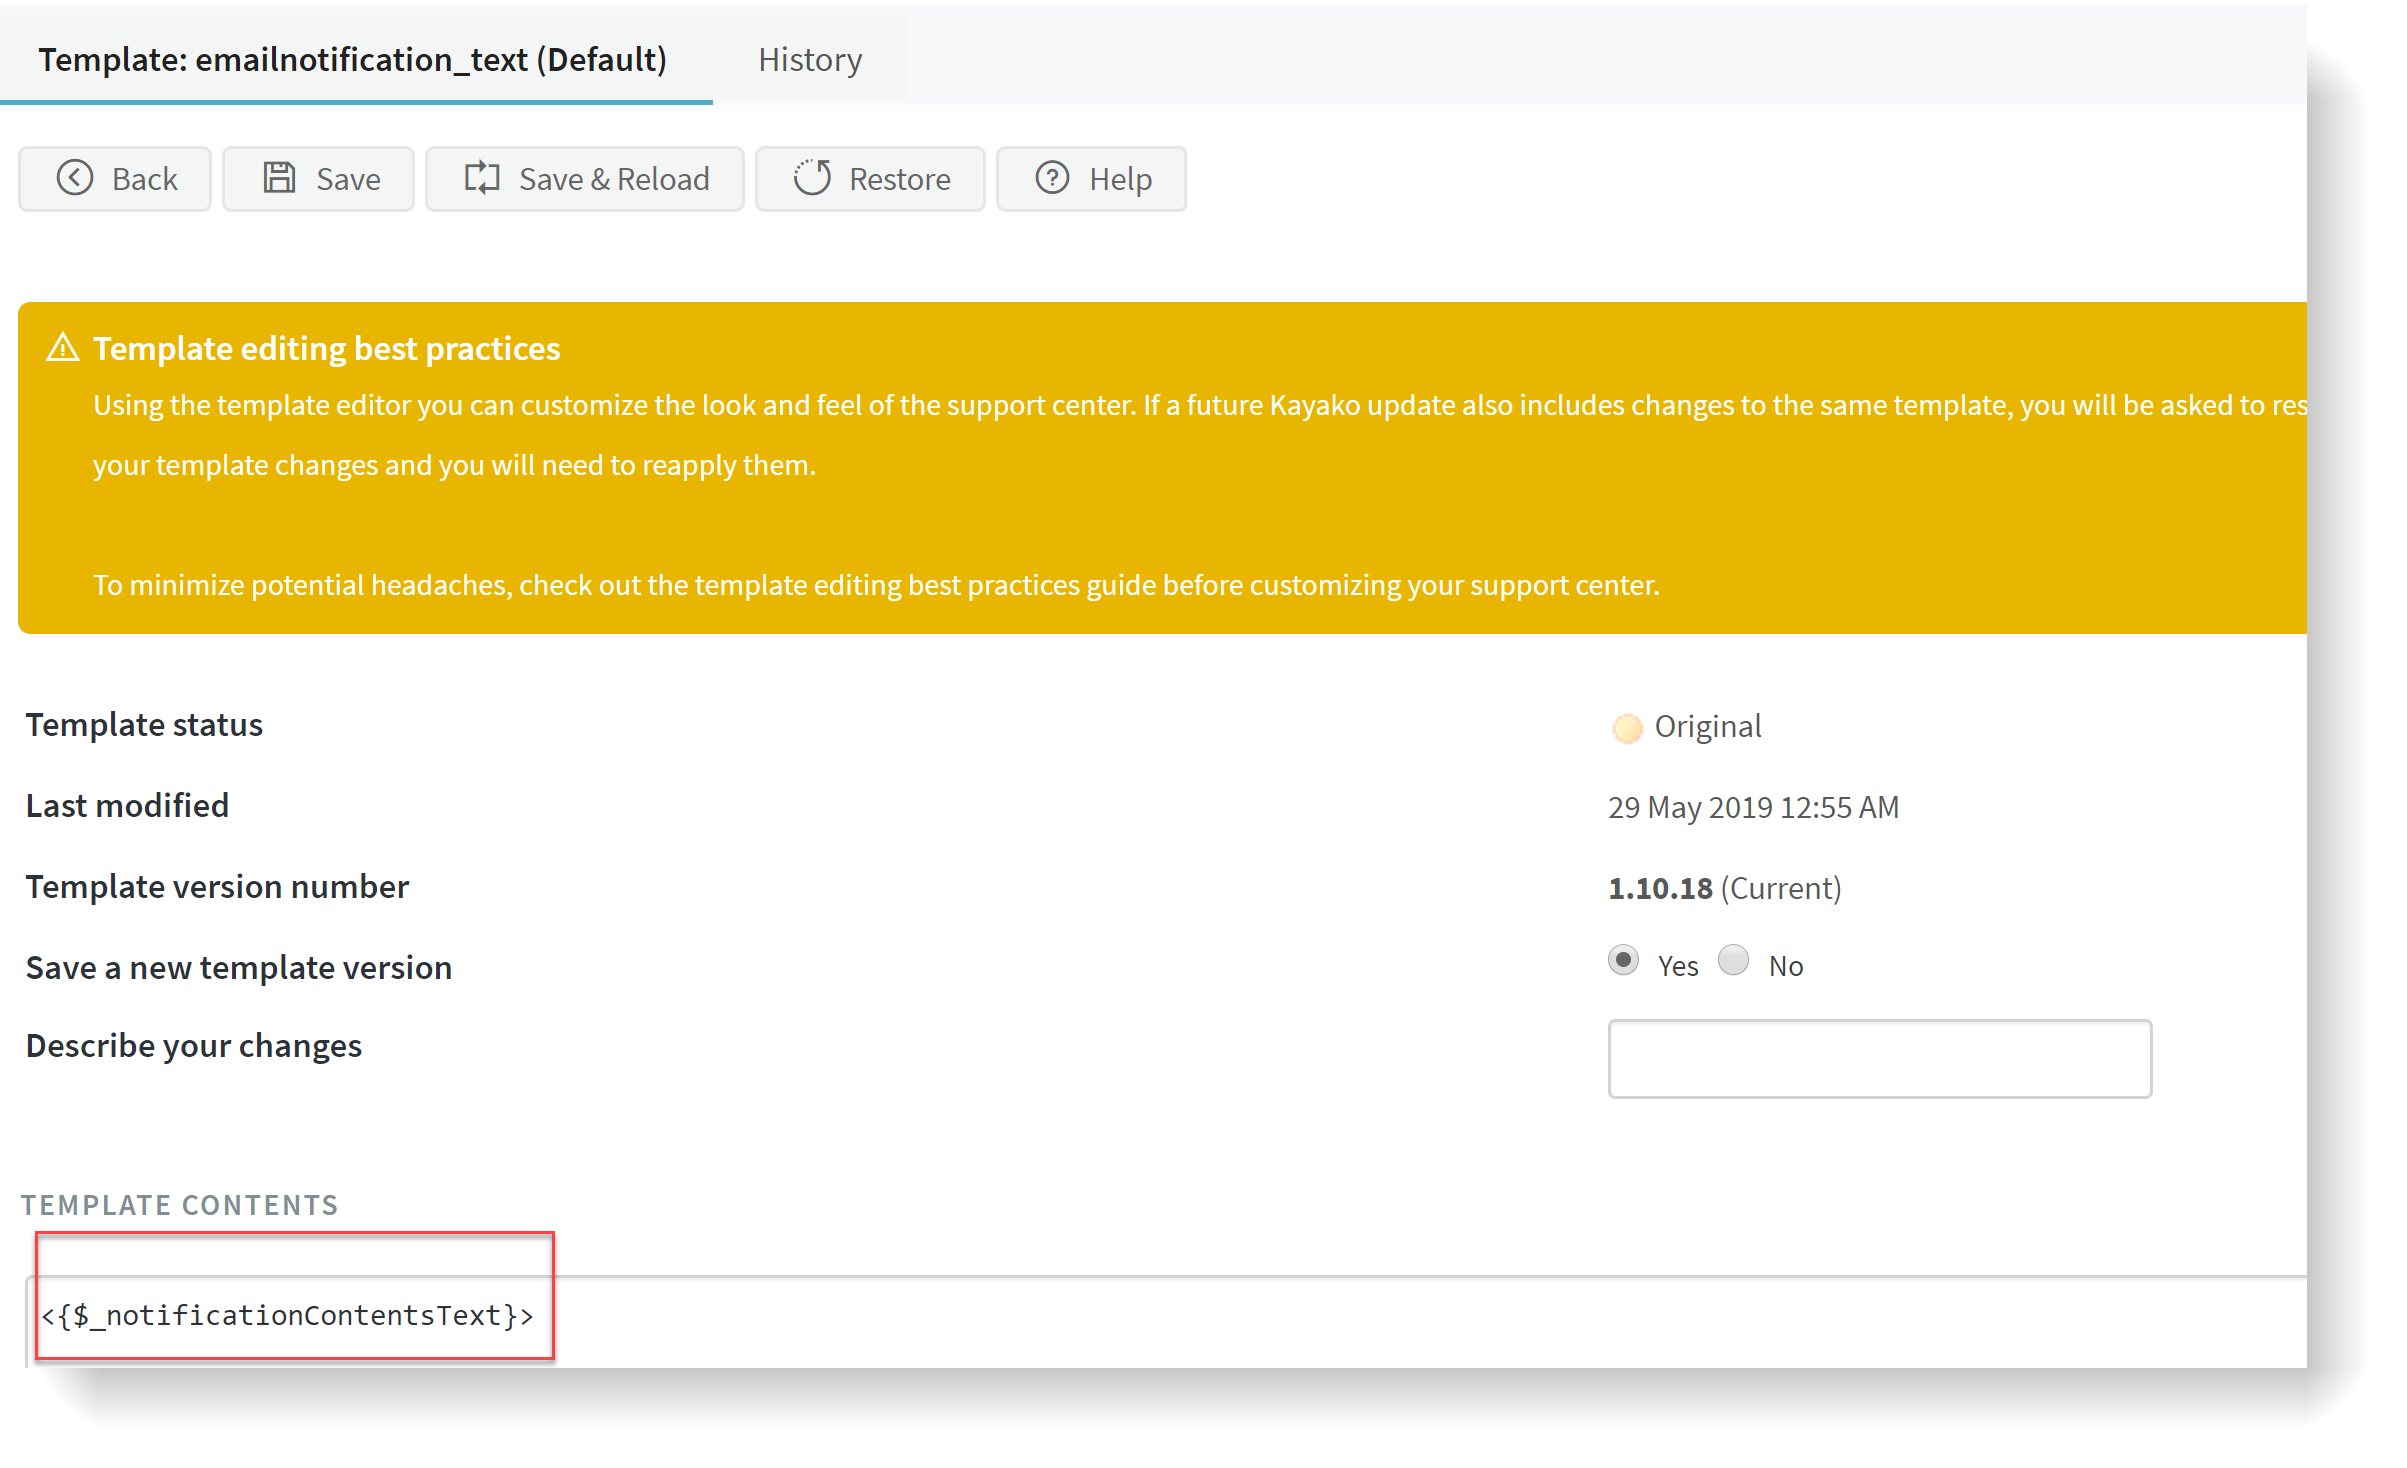
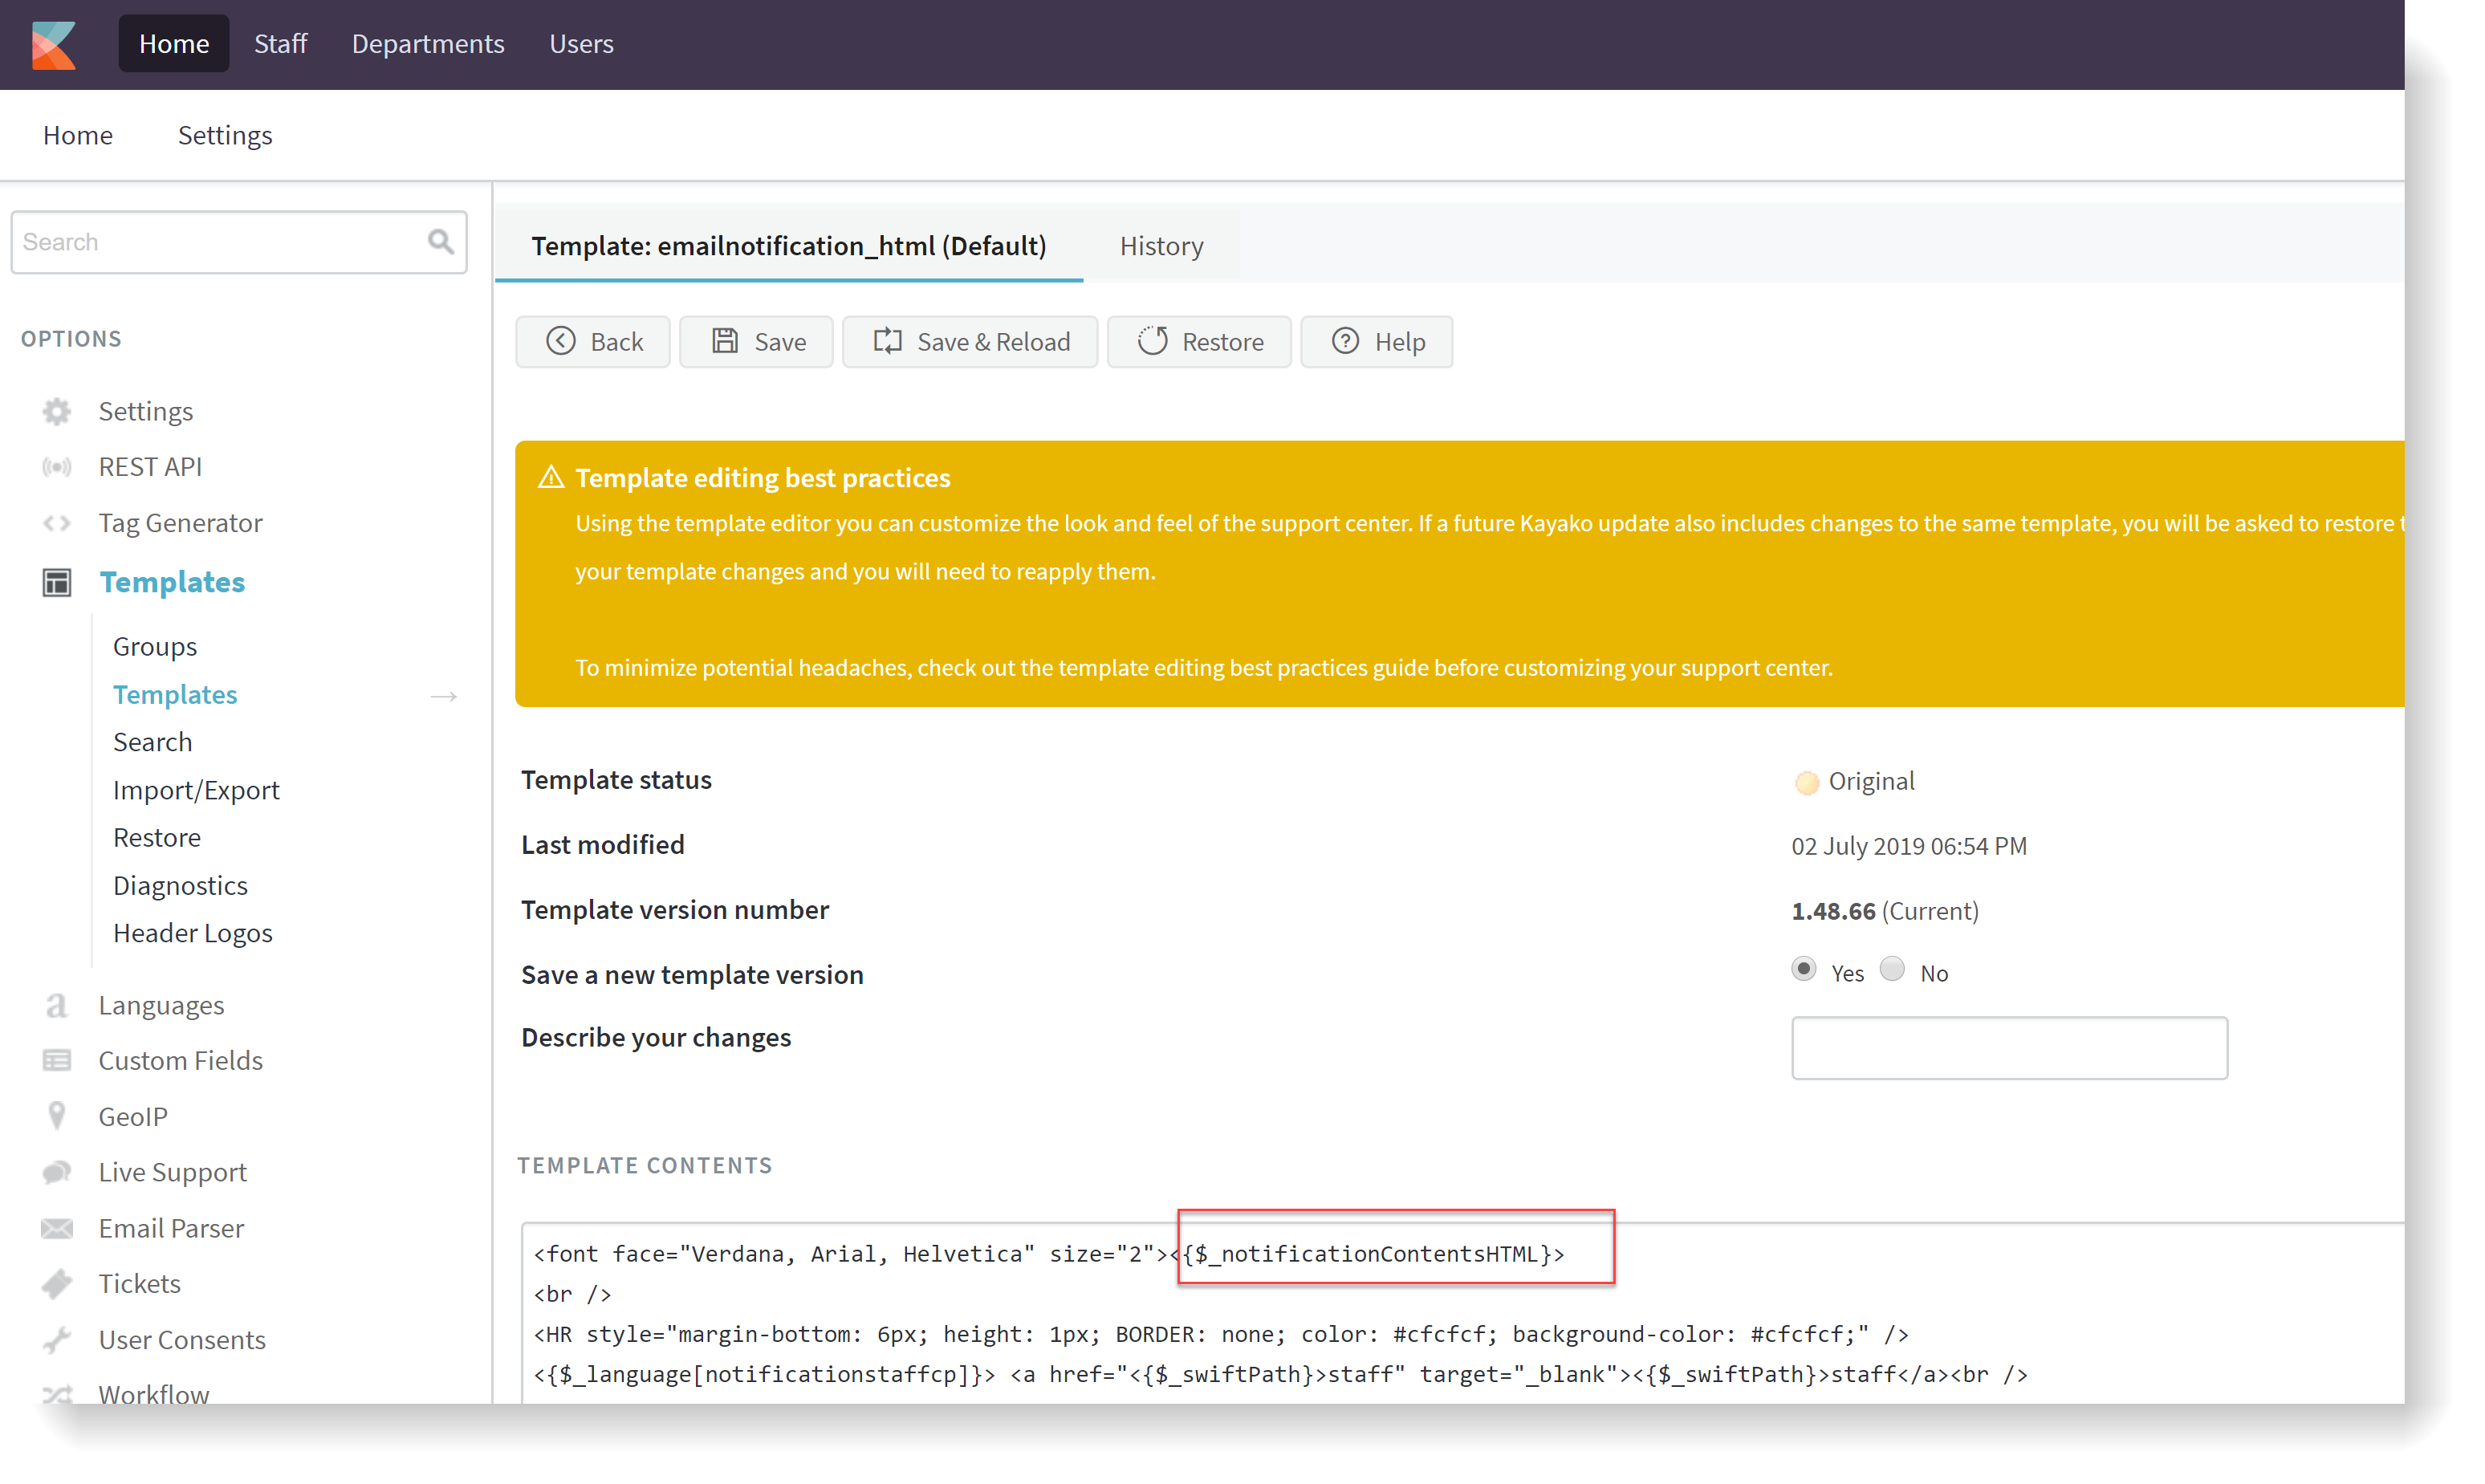
In the Template Contents text area, you'll see the default variable:
<{$_notificationContentsText}> -
Select and delete this variable:
-
Now, to add your preferred content to the template, you can add any combination of the following variables. Simply copy them and paste them into the Template Contents window in the order in which they should appear
Variable
Function
<{$_ticketNotification[subject]}>Ticket subject
<{$_ticketNotification[ticketid]}>Ticket ID/mask
<{$_ticketNotification[ticketlink]}>Ticket hyperlink
<{$_ticketNotification[fullname]}>Customer's full name
<{$_ticketNotification[email]}>Customer's email address
<{$_ticketNotification[phoneno]}>Customer's phone number
<{$_ticketNotification[creator]}>Creator (i.e., user/staff)
<{$_ticketNotification[department]}>Ticket department
<{$_ticketNotification[owner]}>Ticket owner's full name
<{$_ticketNotification[type]}>Ticket type
<{$_ticketNotification[status]}>Ticket status
<{$_ticketNotification[priority]}>Ticket priority
<{$_ticketNotification[slaplantitle]}>SLA plan on ticket
<{$_ticketNotification[templategrouptitle]}>Template group used
<{$_ticketNotification[created]}>Ticket creation date & time
<{$_ticketNotification[updated]}>Last activity date & time
<{$_ticketNotification[userorganization]}>User's organization name
<{$_ticketNotification[changedby]}>The person who made changes
<{$_ticketNotification[changes]}>Changes that took place
<{$_ticketNotification[content]}>Last ticket post contents
<{$_ticketNotification[duedate]}>Reply due date & time
<{$_ticketNotification[resolutionduedate]}>Resolution due date & time
Custom fields:
<{$_customFields[GroupName][FieldName]}>Valid examples for the GroupName and FieldName:
GroupName is -Testing group
FieldName are - Testing, Testing text, Text-area, Select_value, Testing-123Template changes will be:
<{$_customFields[Testing_roup][Testing]}>
<{$_customFields[Testing_group][Testing_text]}>
<{$_customFields[Testing_group][Text_area]}>
<{>$_customFields[Testing_group][Select_value]}>
<{$_customFields[Testing_group][Testing_123]}>Custom field data.
NOTE: You can use any custom field as a variable by copying this tag and swapping in the group and field name for your custom field. Only ticket custom fields can be used in the notifications email templates.
-
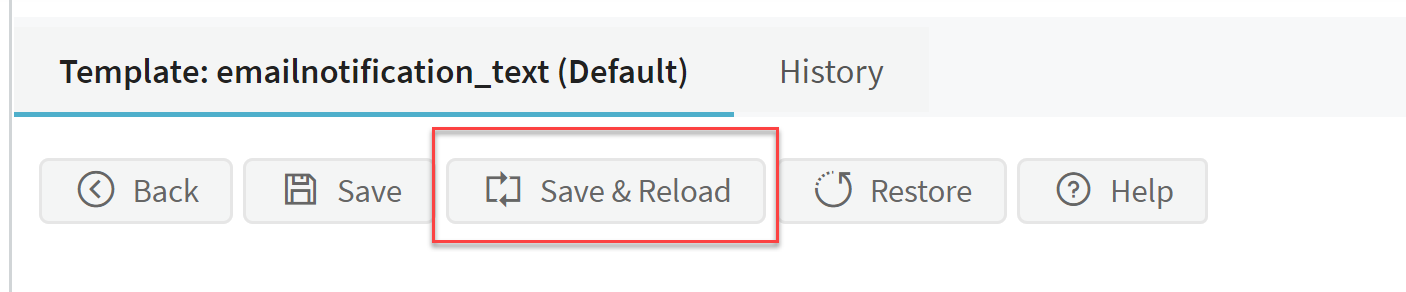
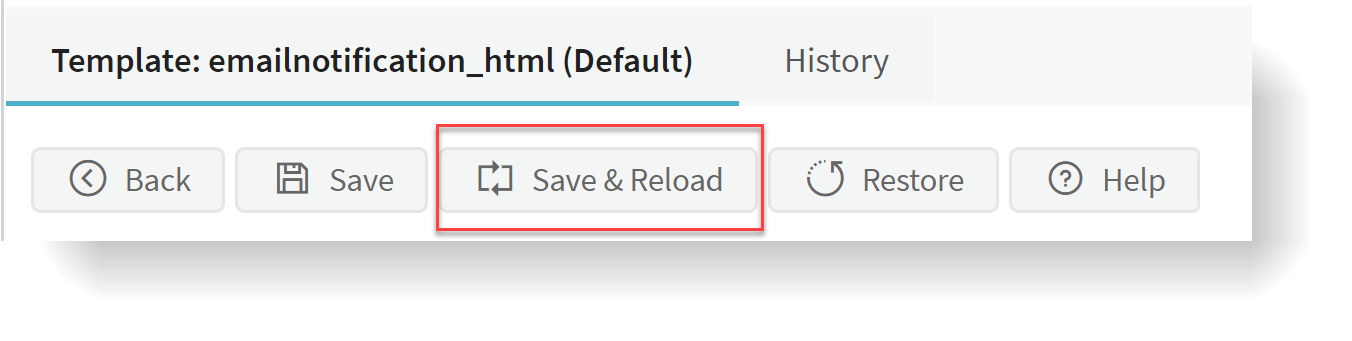
When you're happy with your changes, click the Save & Reload button.
-
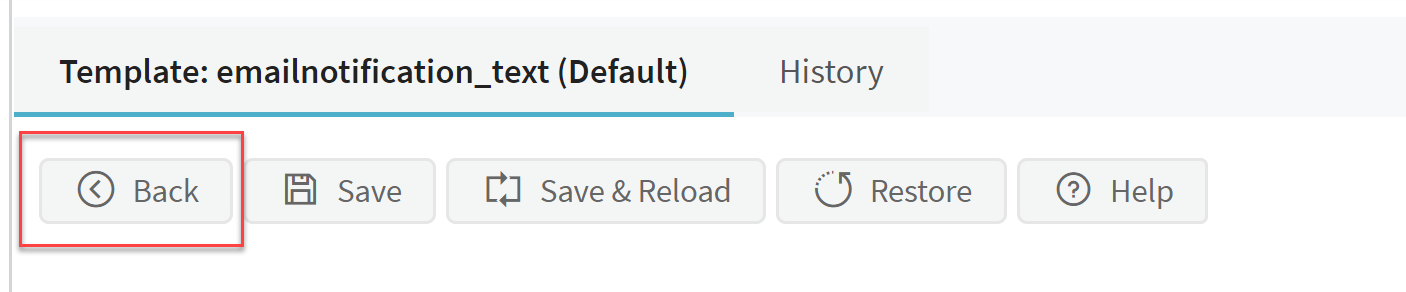
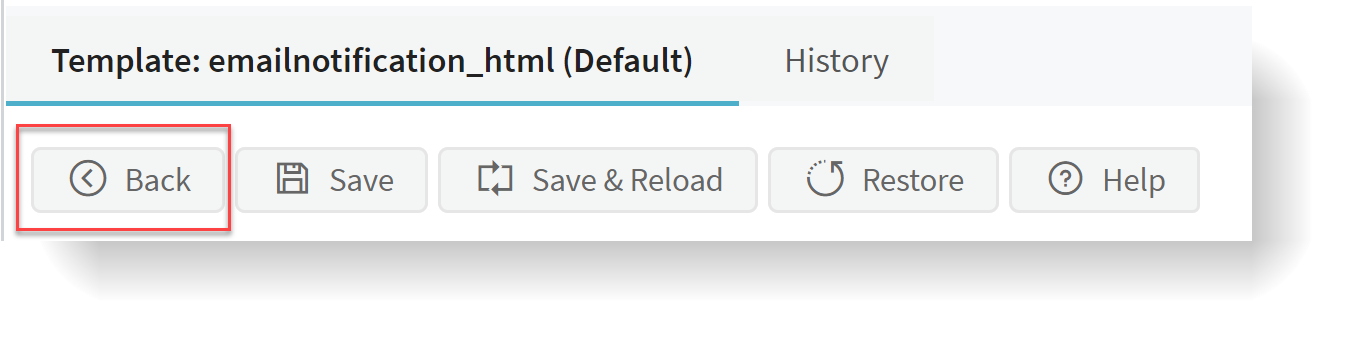
Next, let's tackle the emailnotification_html template. Click the Back button to return to the list of templates.
-
Click emailnotification_html in the list to open it for editing.
-
This time, you're looking for:
<{$_notificationContentsHTML}> -
Select and delete this variable, and add your own variables, as you did above.
-
Save the Template changes by clicking the Save & Reload button on top.
-
Click the Back button to return to the list of General templates.
-
To edit the user notification email templates, you'll follow exactly the steps as above, but you're looking for emailnotificationuser_html and emailnotificationuser_text. The same variables are supported.

Priyanka Bhotika
Comments